
Microsoft Entra application: registration and permissions
For UnSpot to work with Microsoft 365 meeting room calendars through an application, you register an application in Microsoft Entra in your tenant, grant it permissions for calendars and for the room list, and then hand three values over to UnSpot. This article covers the preparation on the Microsoft side; setting the connection up is described separately.
What you need
- Access to Microsoft Entra with the right to register applications and to consent to permissions — for example, the Global Administrator role. Without the consent right the preparation cannot be finished: the application will be registered but will not get access to the calendars.
- Meeting rooms set up in Microsoft 365 as room mailboxes. That is exactly where UnSpot takes the room list from.
- Permissions in UnSpot for the second stage: the connection is created by a Super Administrator.
- Microsoft must be able to reach UnSpot. Microsoft checks the notification address at the moment a meeting room calendar is attached to the connection: if UnSpot is not reachable from the internet, the connection is saved but attaching the calendar fails. For cloud UnSpot this is already in place; for an installation in a closed network, agree the access with your UnSpot administrator.
Step 1. Check the meeting room resource calendars
The application receives the list of the organisation’s meeting rooms, not the list of all mailboxes. If a room is set up as a regular user rather than a resource, it will not appear in the list and its calendar cannot be connected this way. How to create a resource — see Create a resource calendar in Office 365.
The application does not need permissions on each calendar separately — that is exactly what sets the application option apart from a connection under an account.
Step 2. Register the application
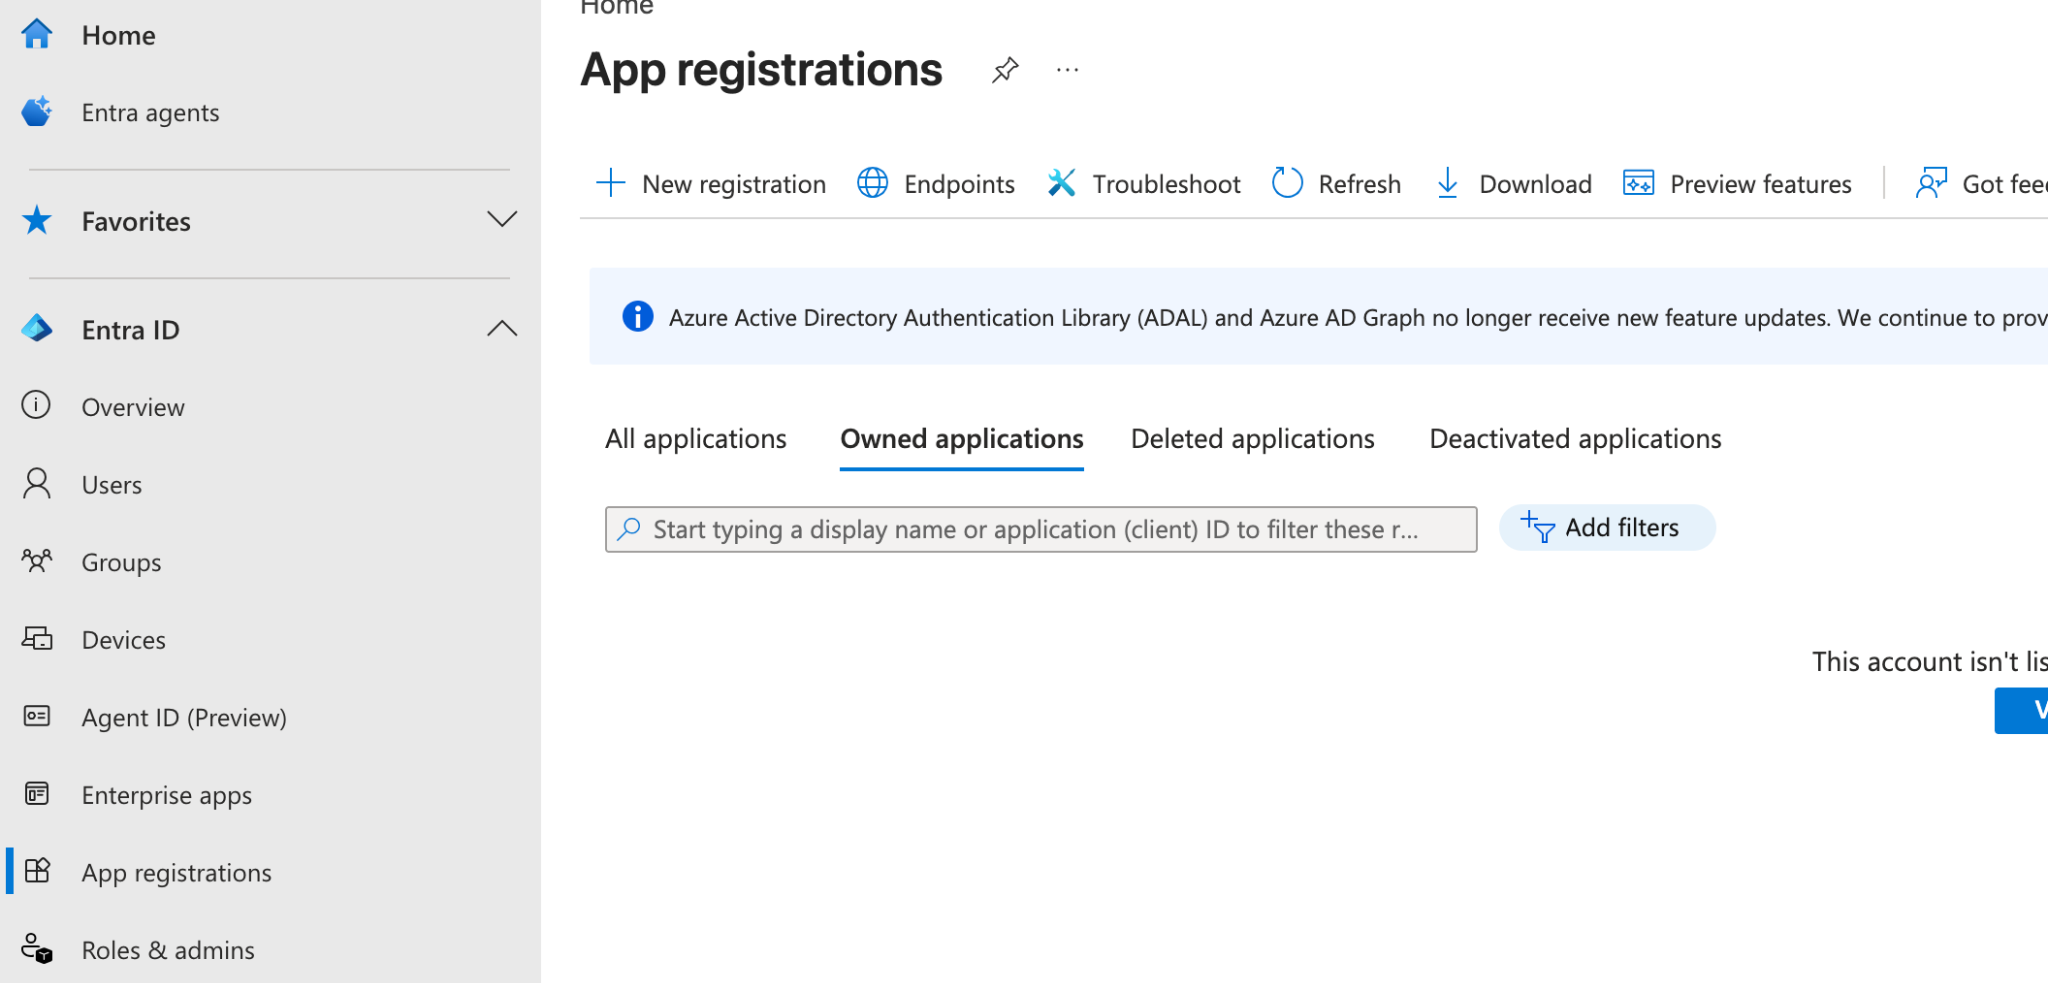
- Open entra.microsoft.com, pick App registrations in the left-hand menu and press New registration.
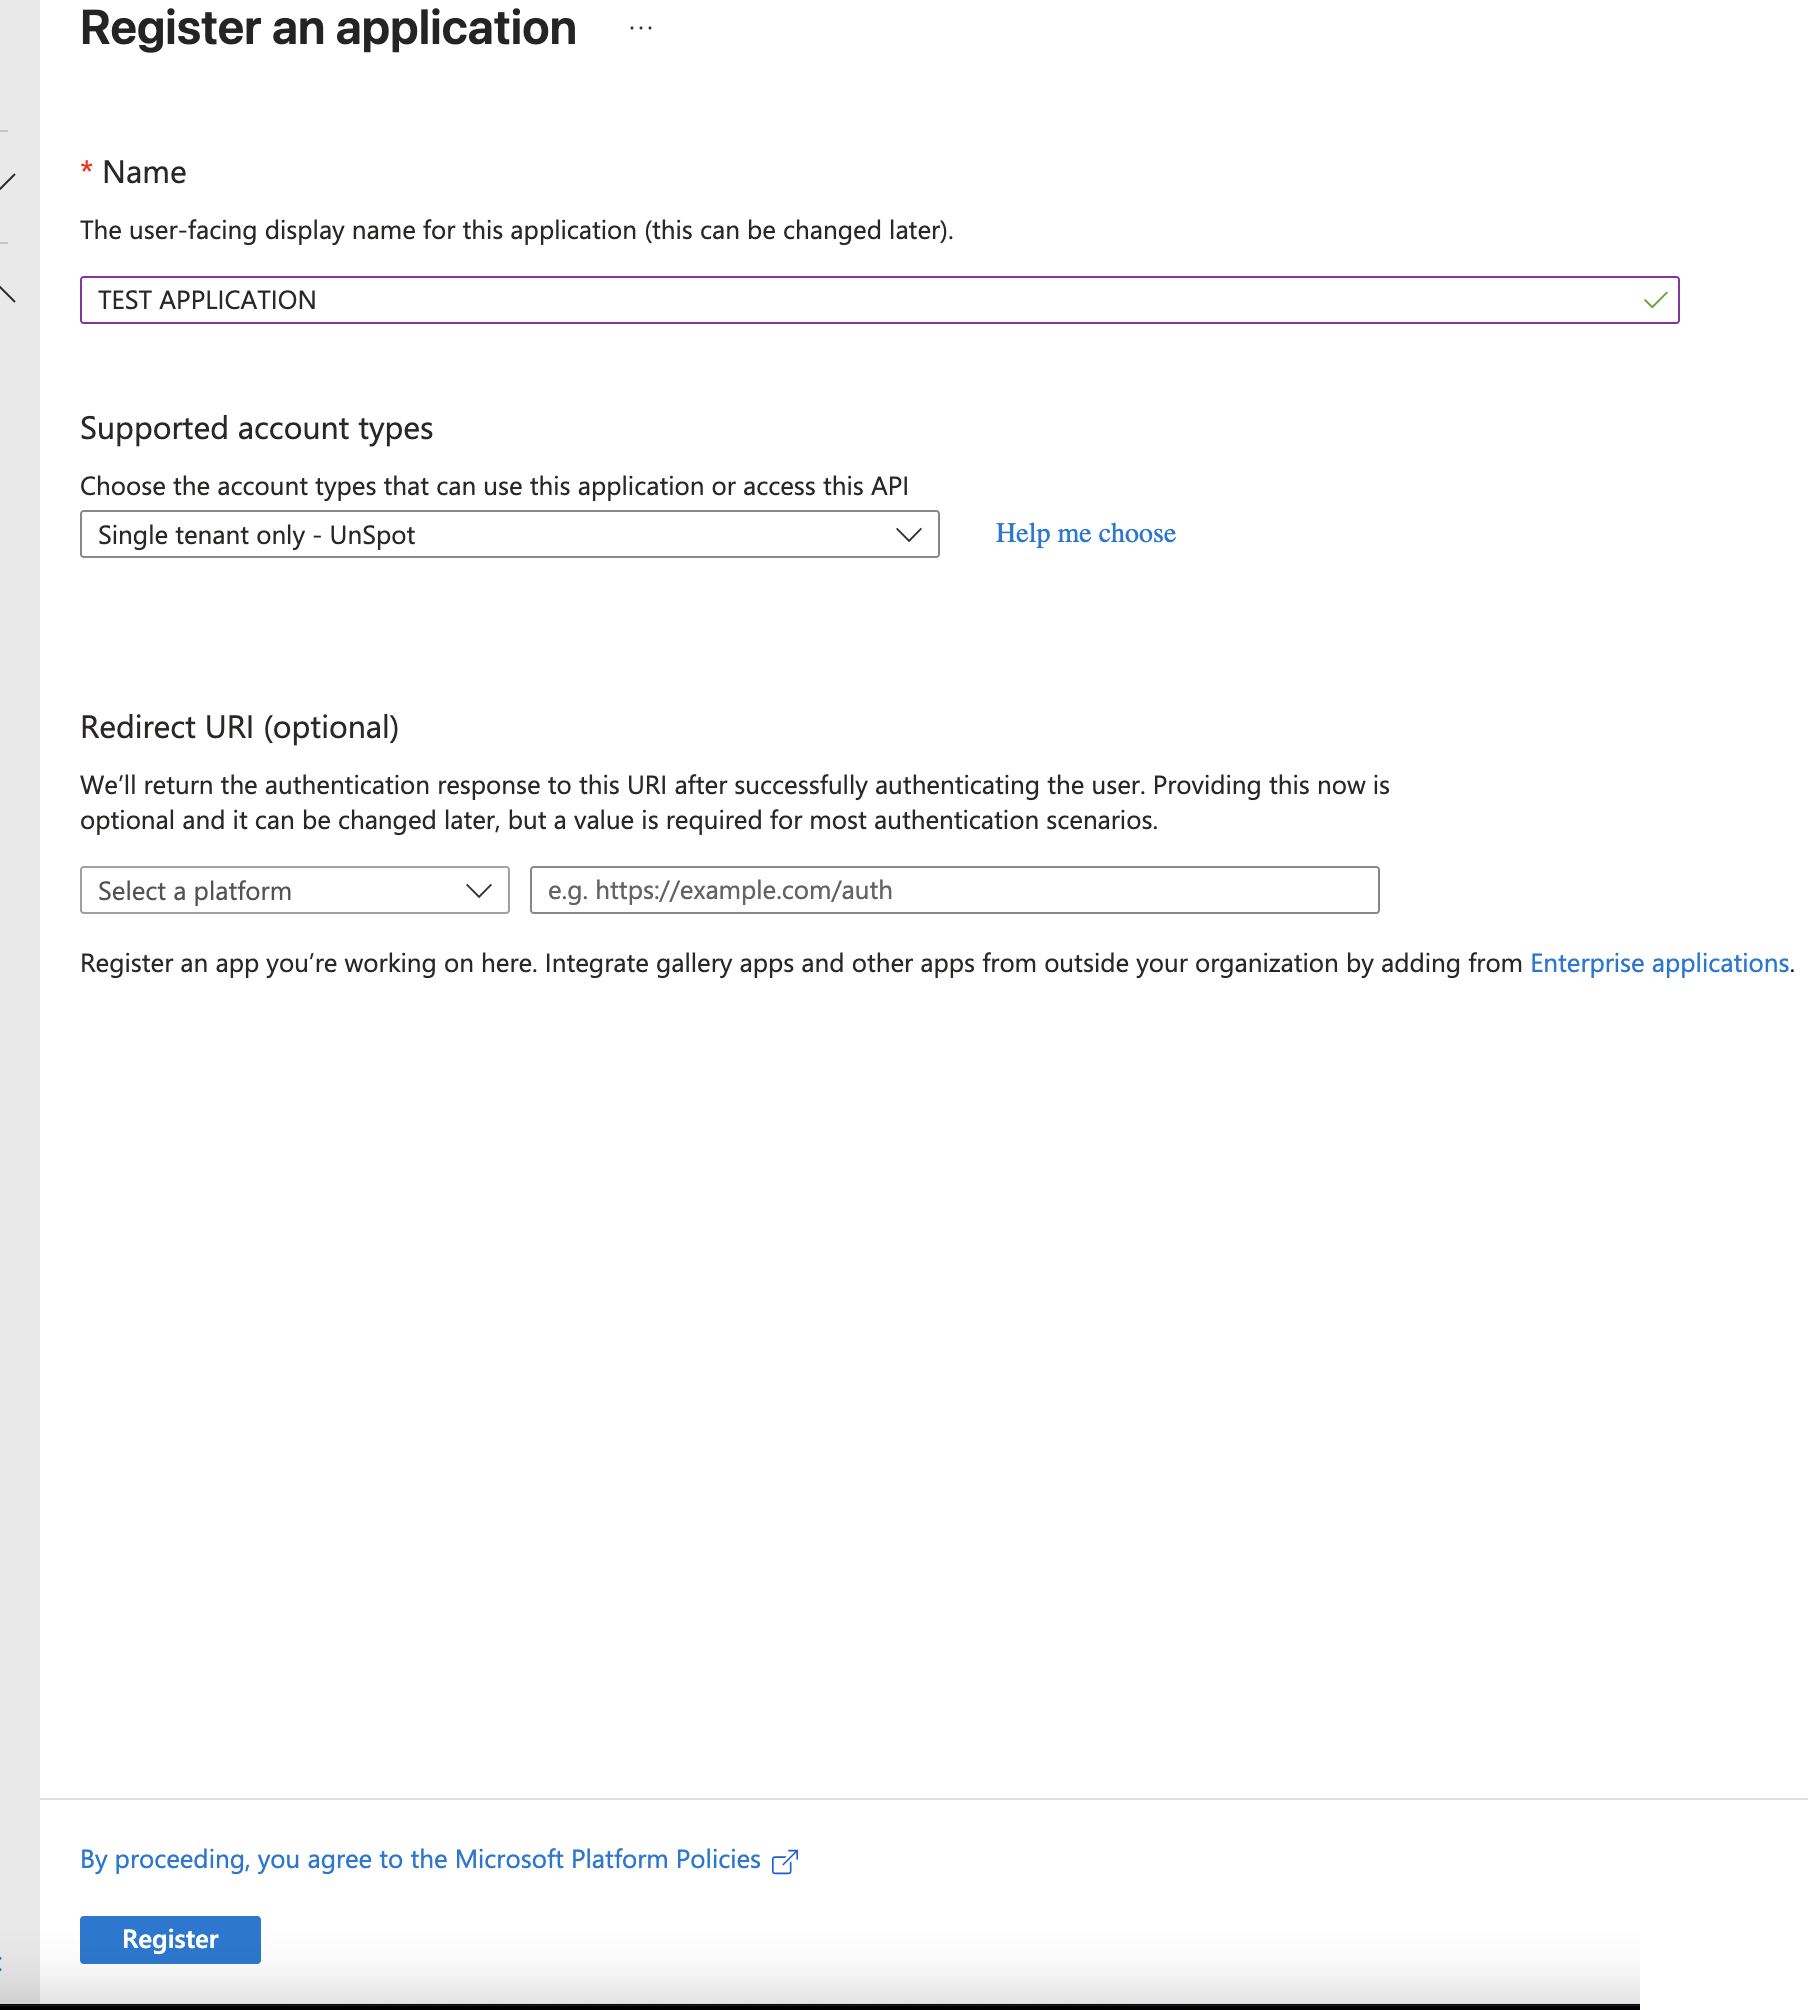
- Enter any name in the Name field — for example, UnSpot Calendars.
- In Supported account types pick the single-tenant option: Accounts in this organizational directory only (Single tenant).
- Redirect URI does not have to be filled in: the application works without an interactive user sign-in.
- Press Register.
Step 3. Create the application secret
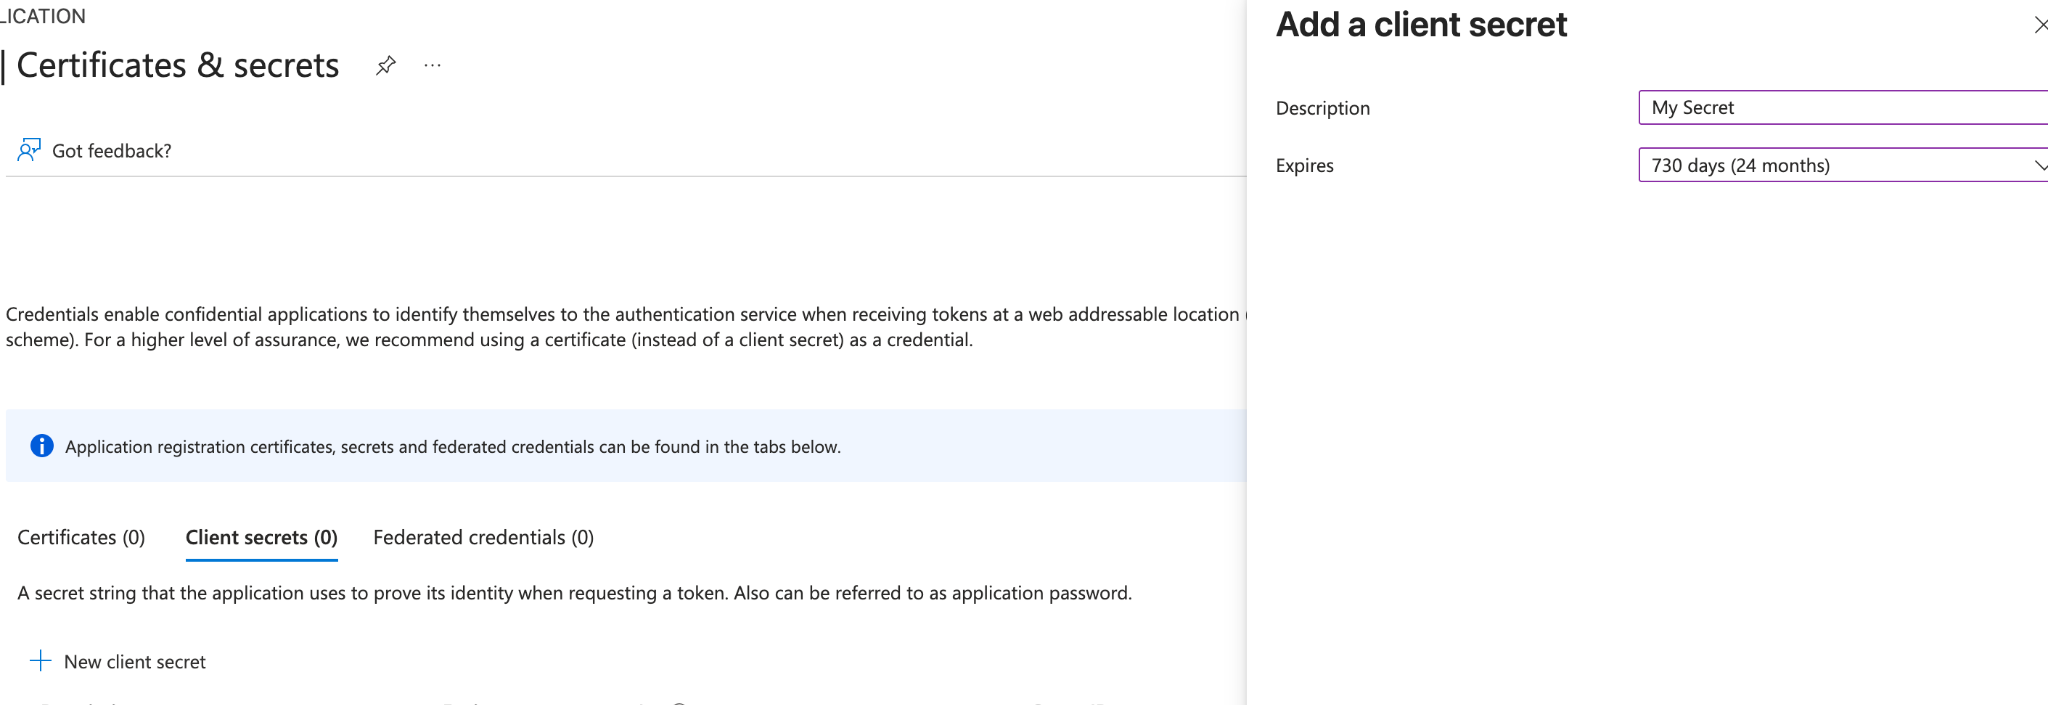
- On the application page open Certificates & secrets (or the Add a certificate or secret link on the Overview tab).
- Press New client secret, fill in Description if you like and pick an expiry period — we recommend the longest one.
- Press Add.
- Copy the value from the Value column right away. Once you leave the page Microsoft will not show the secret in full again, and it will have to be created anew.

The secret is the application’s password. Keep it the way you keep a service account password: do not send it over messengers and do not leave it in email threads.
Step 4. Copy the identifiers
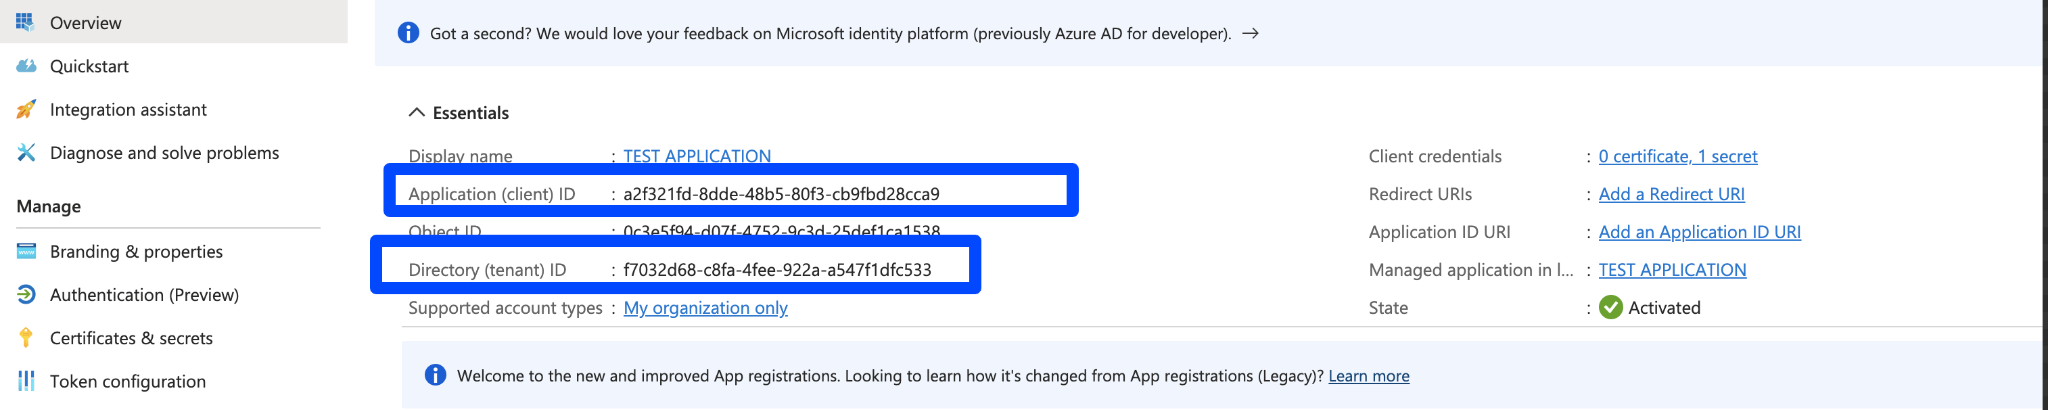
Both values are on the application’s Overview tab:
| Value in Entra | What it is called in UnSpot |
|---|---|
| Application (client) ID | ClientId |
| Directory (tenant) ID | TenantId |
Step 5. Grant the permissions and consent to them
- On the application page open API permissions and press Add a permission.
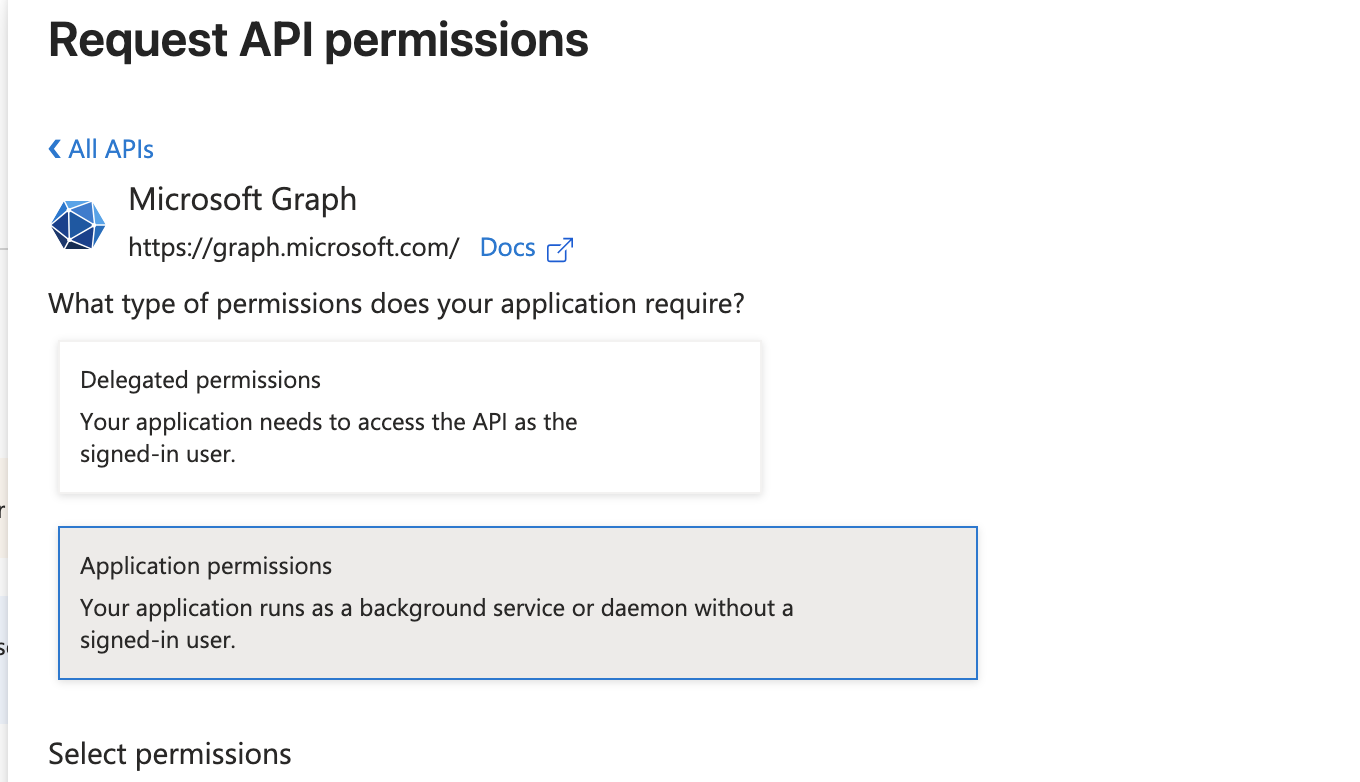
- Pick Microsoft Graph, then Application permissions — not Delegated permissions: the application works without a user.
- Tick the two permissions and press Add permissions.
- Press Grant admin consent and confirm. Both permissions must end up with a green Granted mark in the Status column.
| Permission | What it is for |
|---|---|
| Place.Read.All | reading the organisation’s meeting room list — UnSpot builds the room list from it when a calendar is connected |
| Calendars.ReadWrite | reading and changing calendar events: creating meetings from UnSpot bookings and reading meetings created in Outlook |

Once consent is confirmed, the status of both permissions changes to Granted:
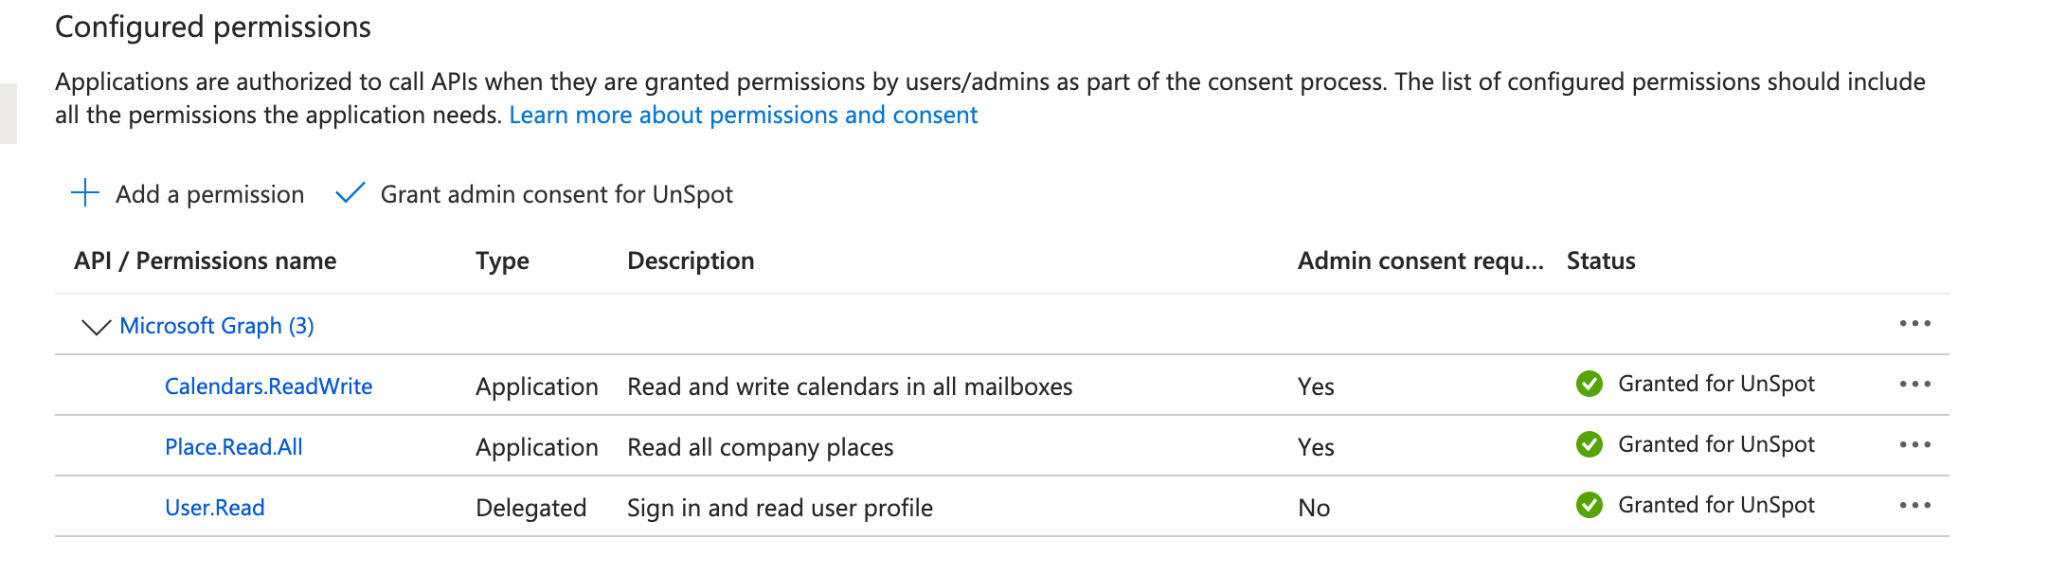
The delegated User.Read permission that Entra adds when an application is registered does not have to be touched — it does not interfere.
The permission names are given as per Microsoft documentation: UnSpot requests an application token with the default scope, and the actual set of rights is defined in the Entra application itself. What UnSpot needs are two capabilities — reading the organisation’s meeting room list, and reading and changing events in the calendars of their mailboxes.
Without Grant admin consent the permissions stay requested but not effective. UnSpot will then refuse to save the connection and show Insufficient permissions for service account or application.
Limiting the application scope
The application-level Calendars.ReadWrite permission applies to the calendars of all mailboxes in the tenant, not only the meeting rooms. If that breadth is unacceptable, the application scope is limited on the Exchange Online side with a New-ApplicationAccessPolicy policy, which allows the application to reach only a selected group of mailboxes. The procedure is described in Microsoft documentation; nothing extra is required on the UnSpot side.
If the policy is set too narrowly and the meeting room resource mailboxes are left out of it, the connection will be saved, but connecting a calendar to a meeting room will fail with an insufficient permissions error.
What you should have before the setup in UnSpot
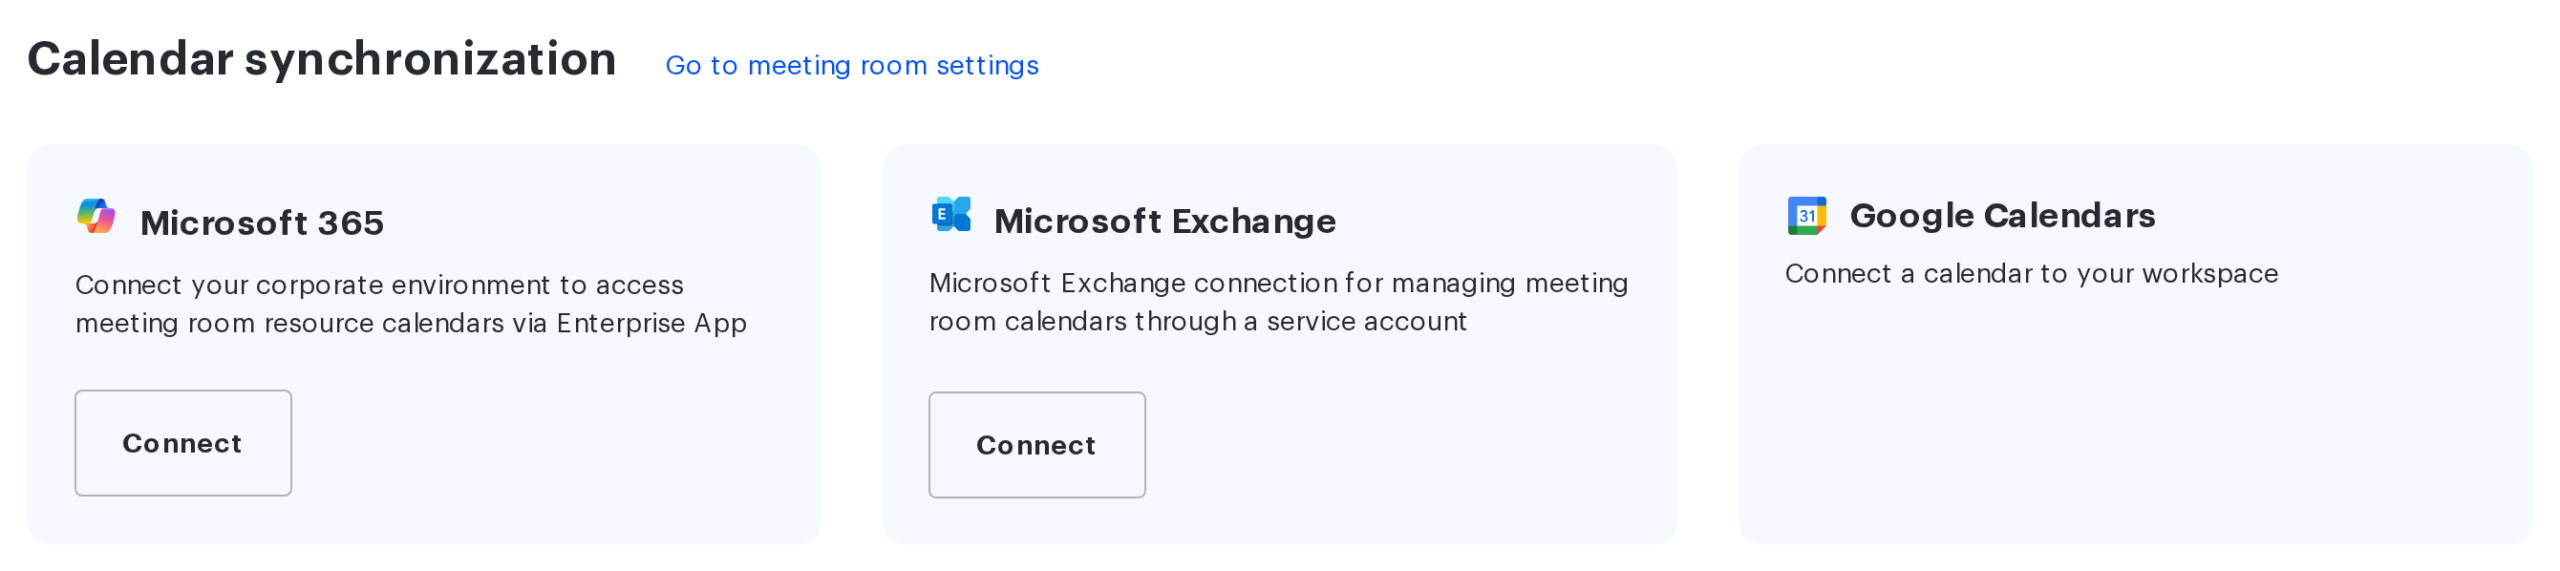
Three values from Entra and any connection name. Next, open Manage → Integrations → Synchronisations and press Connect on the Microsoft 365 card in the Calendar synchronization section:
The values are entered in the Microsoft Connection window that opens:
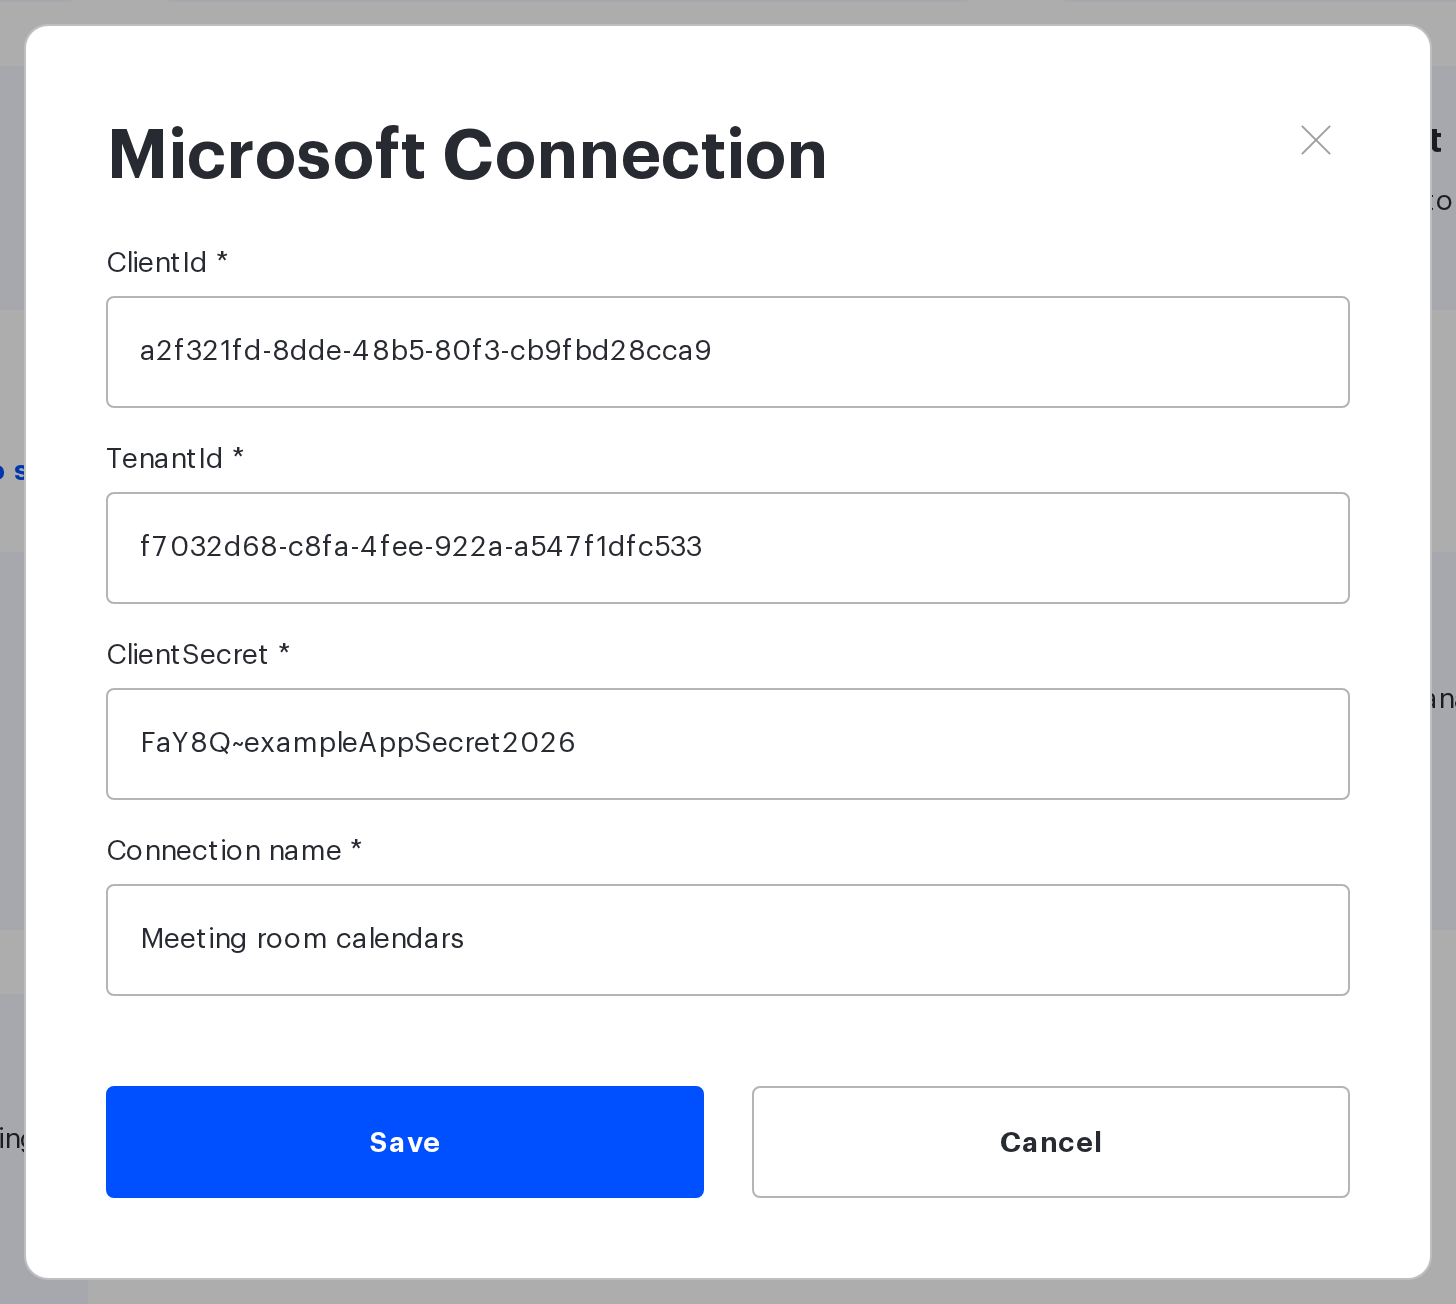
Mind two details of the form: ClientId cannot be changed once the connection is created (and the same ClientId cannot be used in two connections), and the ClientSecret field does not mask its value — enter it when no one else is looking at the screen.
The secret expiry date
The application secret has an expiry date, and on the day it expires the calendar synchronisation stops. The tell-tale sign of exactly this cause: the connection card is marked Connection Error and the meeting rooms show Calendar is not available — while nothing has changed on the Exchange side or in the permissions.
What to do: create a new secret in Entra, then press Edit on the connection card in UnSpot and paste the new value. The connection does not have to be recreated and the meeting room calendars do not have to be reconnected. Set yourself a reminder a couple of weeks before the expiry date — Microsoft does not warn about it.
Common errors
| What UnSpot shows | What to check in Entra |
|---|---|
| Invalid credentials. | the ClientId, TenantId and ClientSecret values; whether the secret has expired; whether the secret value was copied in full |
| Insufficient permissions for service account or application. | both permissions were granted as Application permissions rather than Delegated; Grant admin consent was pressed; the Status column says Granted; the ApplicationAccessPolicy policy does not cut the meeting room mailboxes off |
| Client ID is already used | a connection for this application already exists in UnSpot — use it, or register a separate application |
| The room list is empty | whether the rooms are set up as room mailboxes. There is no need to check Place.Read.All here: without it the connection would not have been saved at all |
| The room you need is missing from the list | its calendar is already connected to another meeting room in UnSpot; the mailbox is not a resource; or the tenant has more than a thousand resource mailboxes — UnSpot requests the list in a single call and does not page through it |
Microsoft sometimes takes a few minutes to apply permissions. If everything looks right and UnSpot still reports insufficient permissions, wait and save again.