
Meeting room displays: connection and setup
A display at the meeting room door shows the room’s schedule and availability for the day, lets people book the room right from the screen, end a meeting early, and confirm a booking when check-in is enabled in your company. This article explains how to connect a tablet to UnSpot and what settings are available for each display.
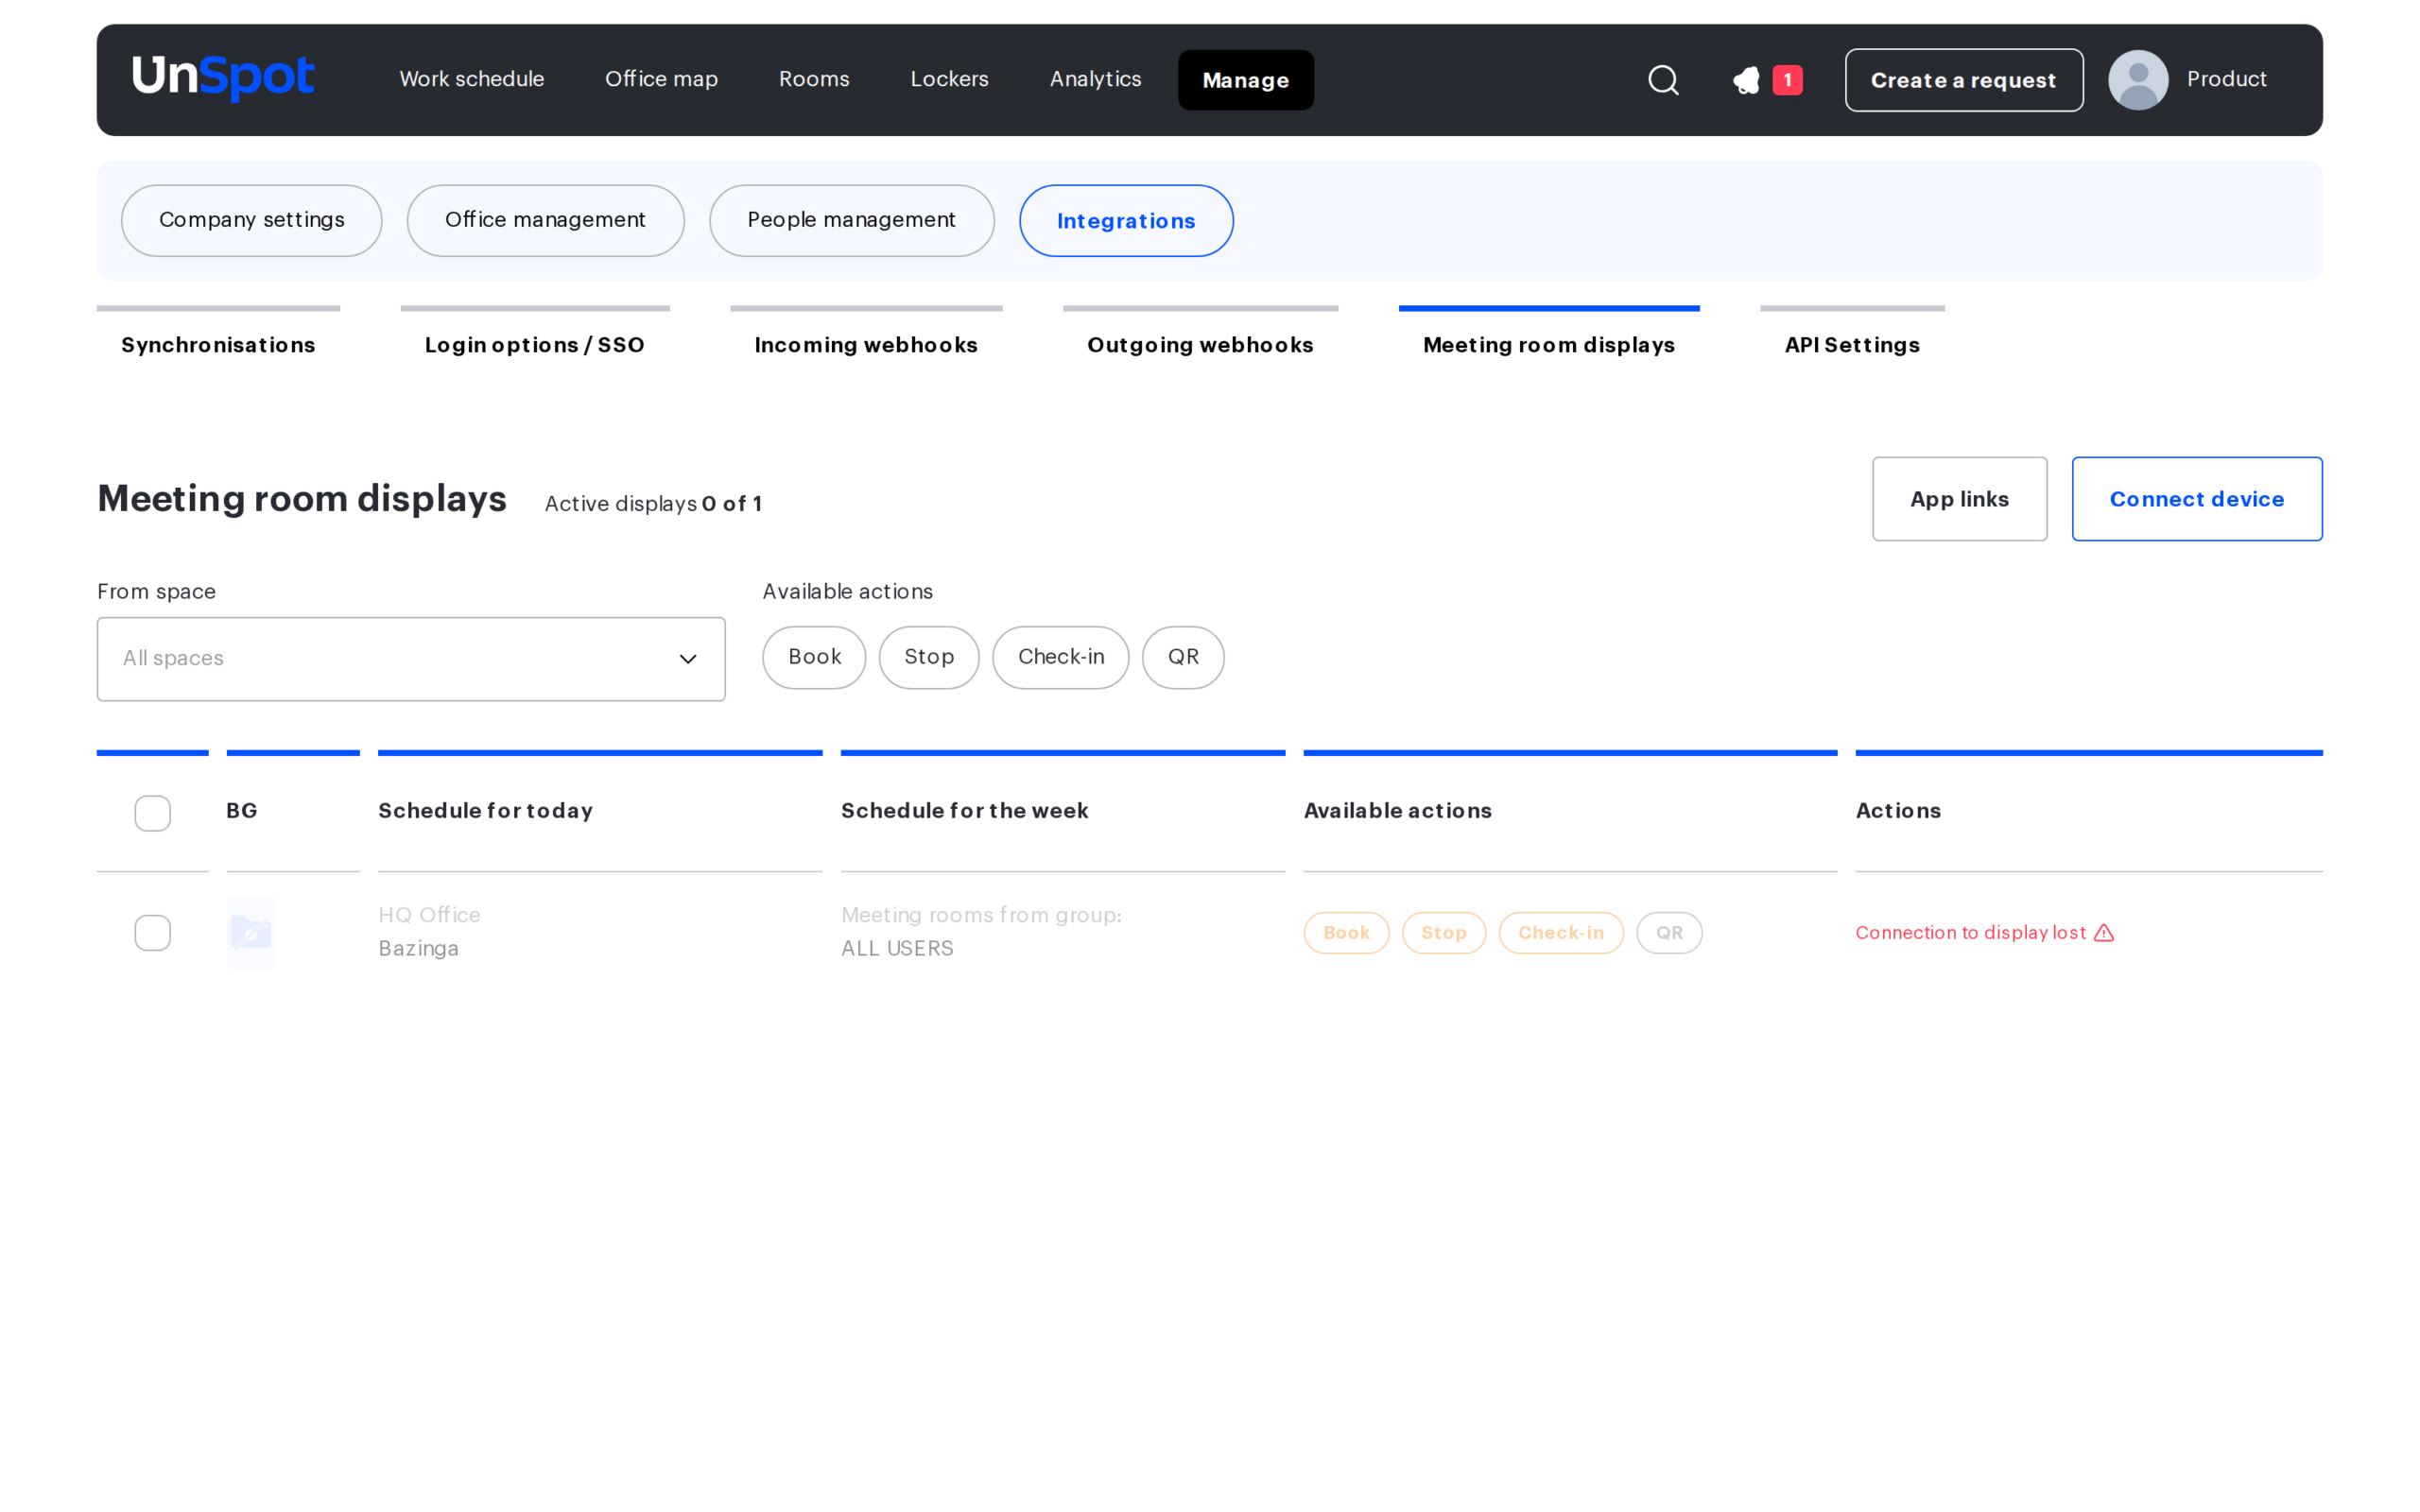
Displays are managed in Manage → Integrations → Meeting room displays. The section is available to users with the Super Administrator or Integrations Administrator role.
How it works
You install the UnSpot meeting room Display app on a tablet (or use its PWA version). When connecting, you create a device record in UnSpot, receive a one-time activation code, and enter it on the tablet together with your company domain. Once activated, the display stays linked to your workspace: it receives the schedule of the selected meeting room and reports its status back to the server.
Each display can show:
- the schedule of one meeting room for today — the main screen with the day’s bookings;
- a weekly schedule for the meeting rooms of a selected group — an overview mode covering several rooms.
You can enable both modes, just one, or neither (the display then shows only the background).
What you need
- The Super Administrator or Integrations Administrator role in UnSpot.
- An iOS or Android tablet with internet access (for the PWA version, see the related articles at the end).
- An existing meeting room — a display can only be linked to a space of the “Meeting room” type.
- For the weekly mode — a group with meeting rooms in Manage → People management → Groups & Teams.
Step 1. Install the app on the tablet
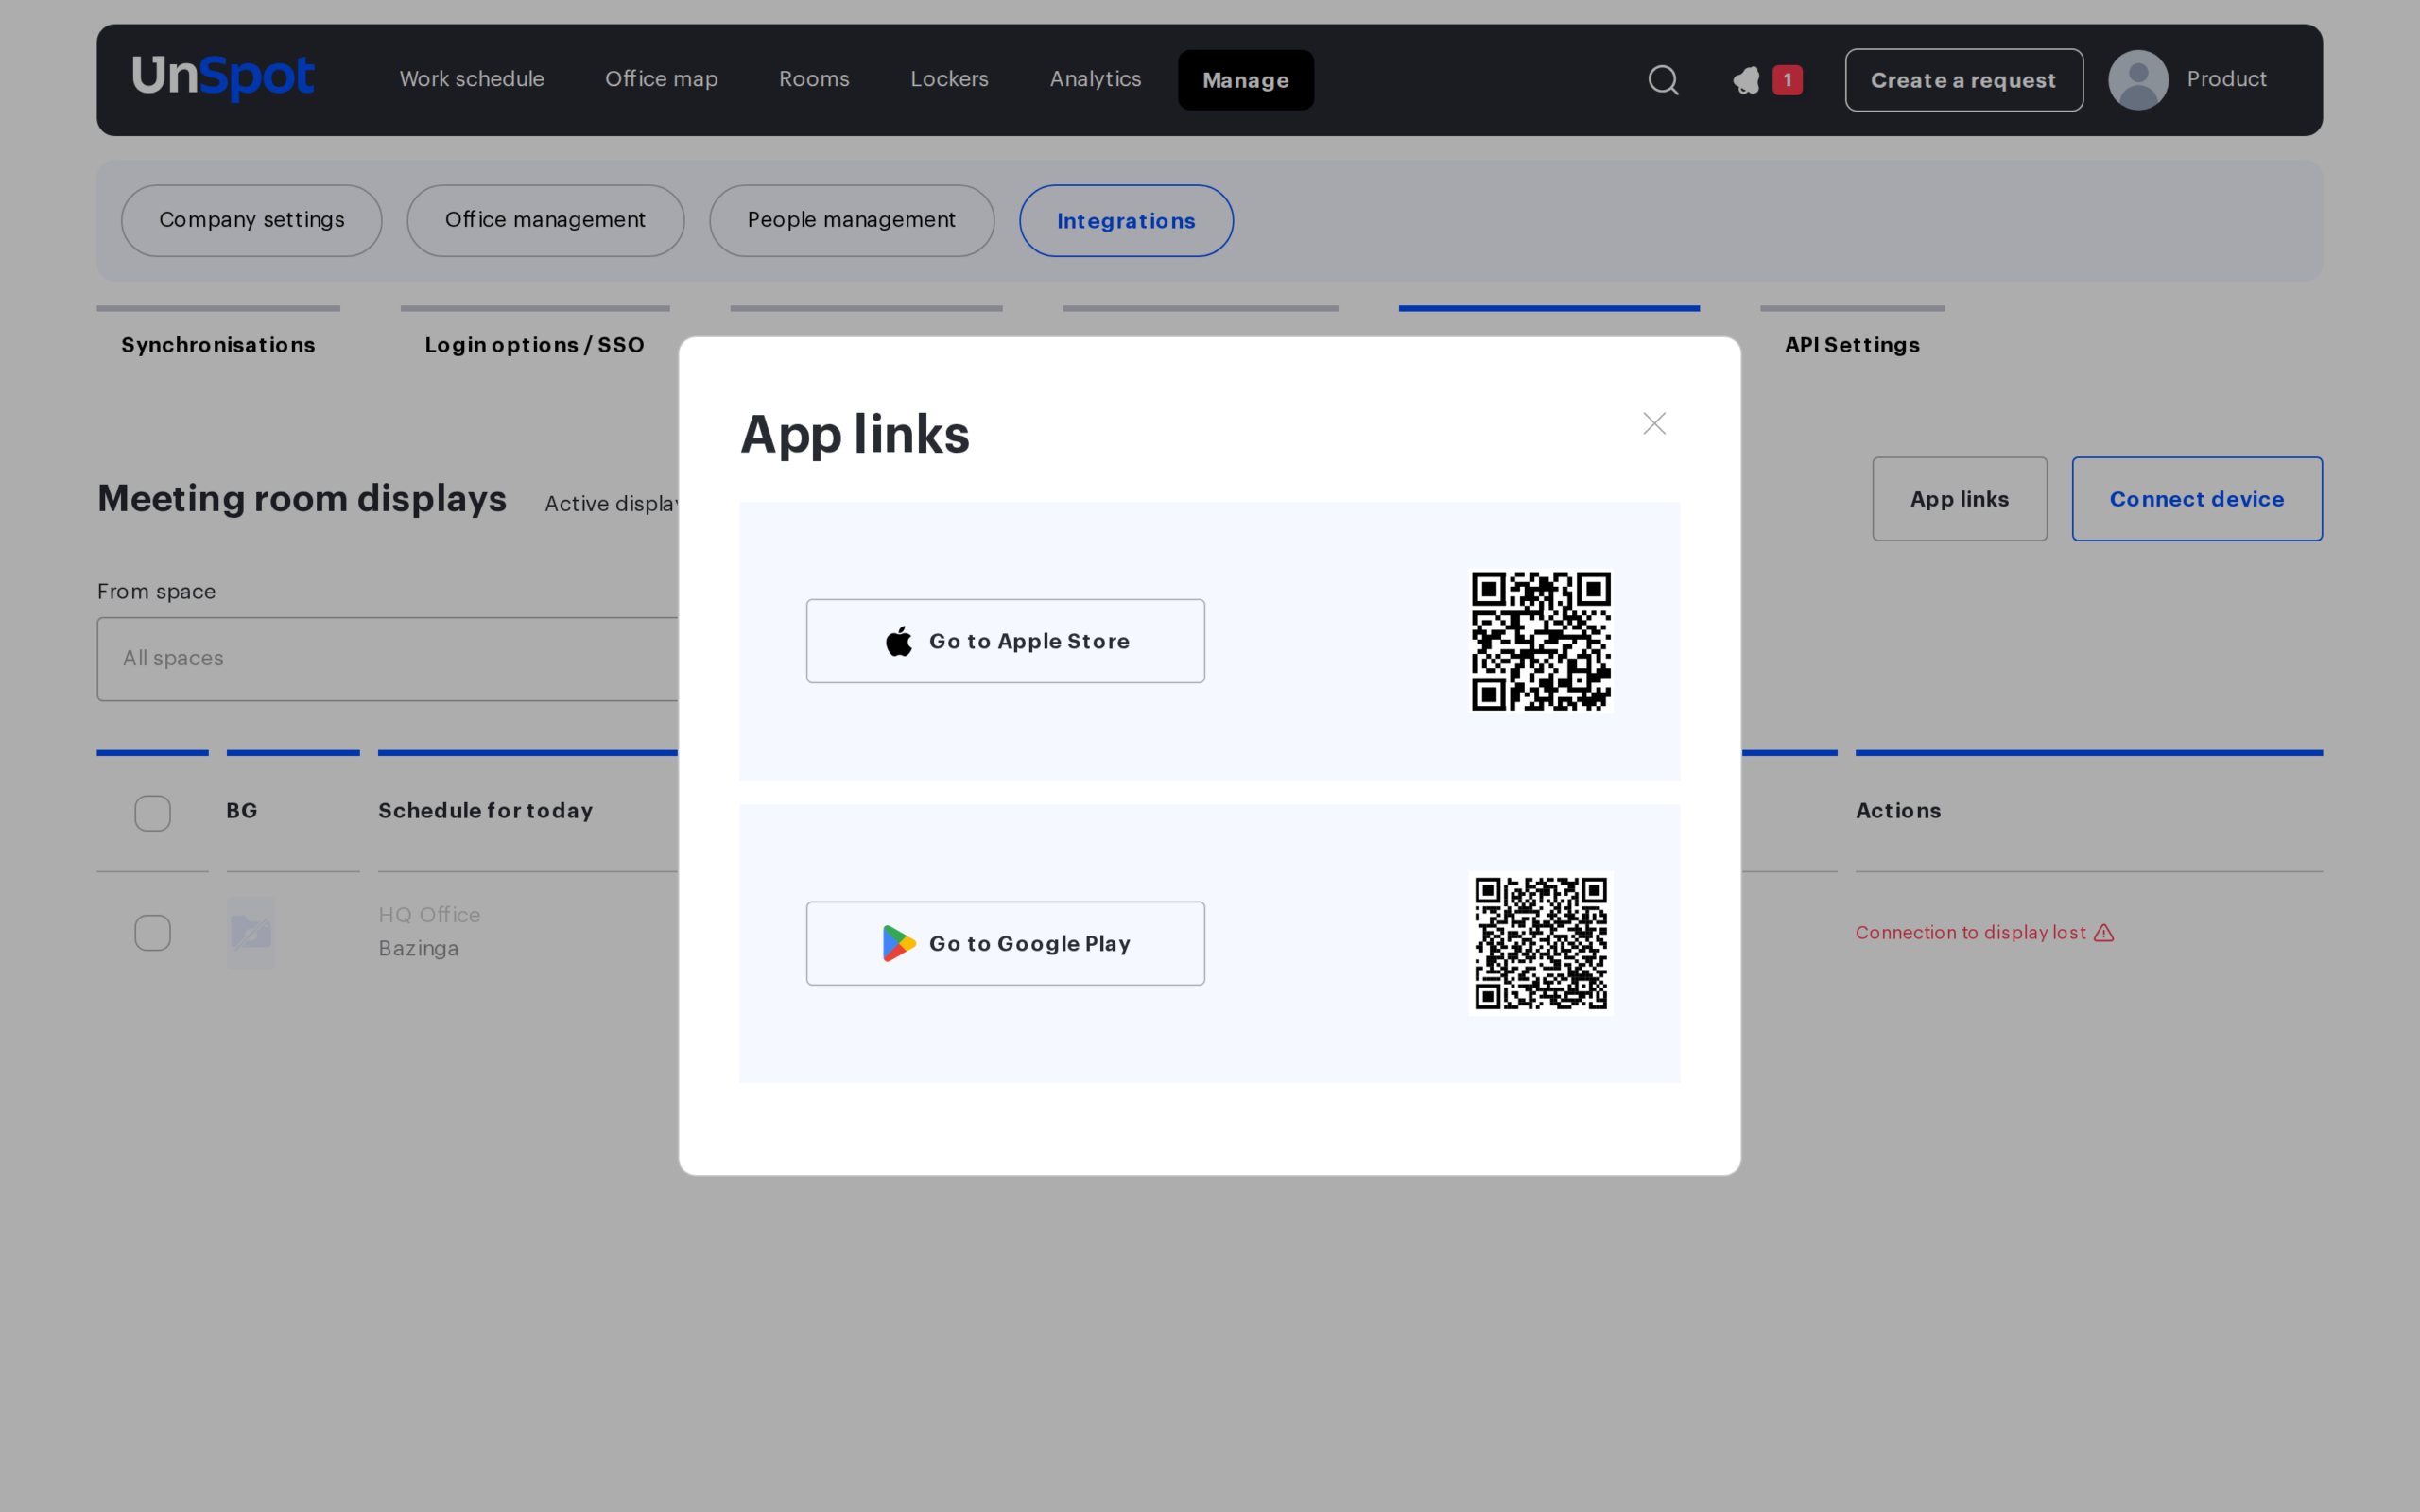
- In the Meeting room displays section, click “App links”.
- Scan the QR code of the relevant store from the tablet, or click “Go to Apple Store” (iPad) or “Go to Google Play” (Android).
- Install the UnSpot meeting room Display app and open it.
Step 2. Connect the device in UnSpot
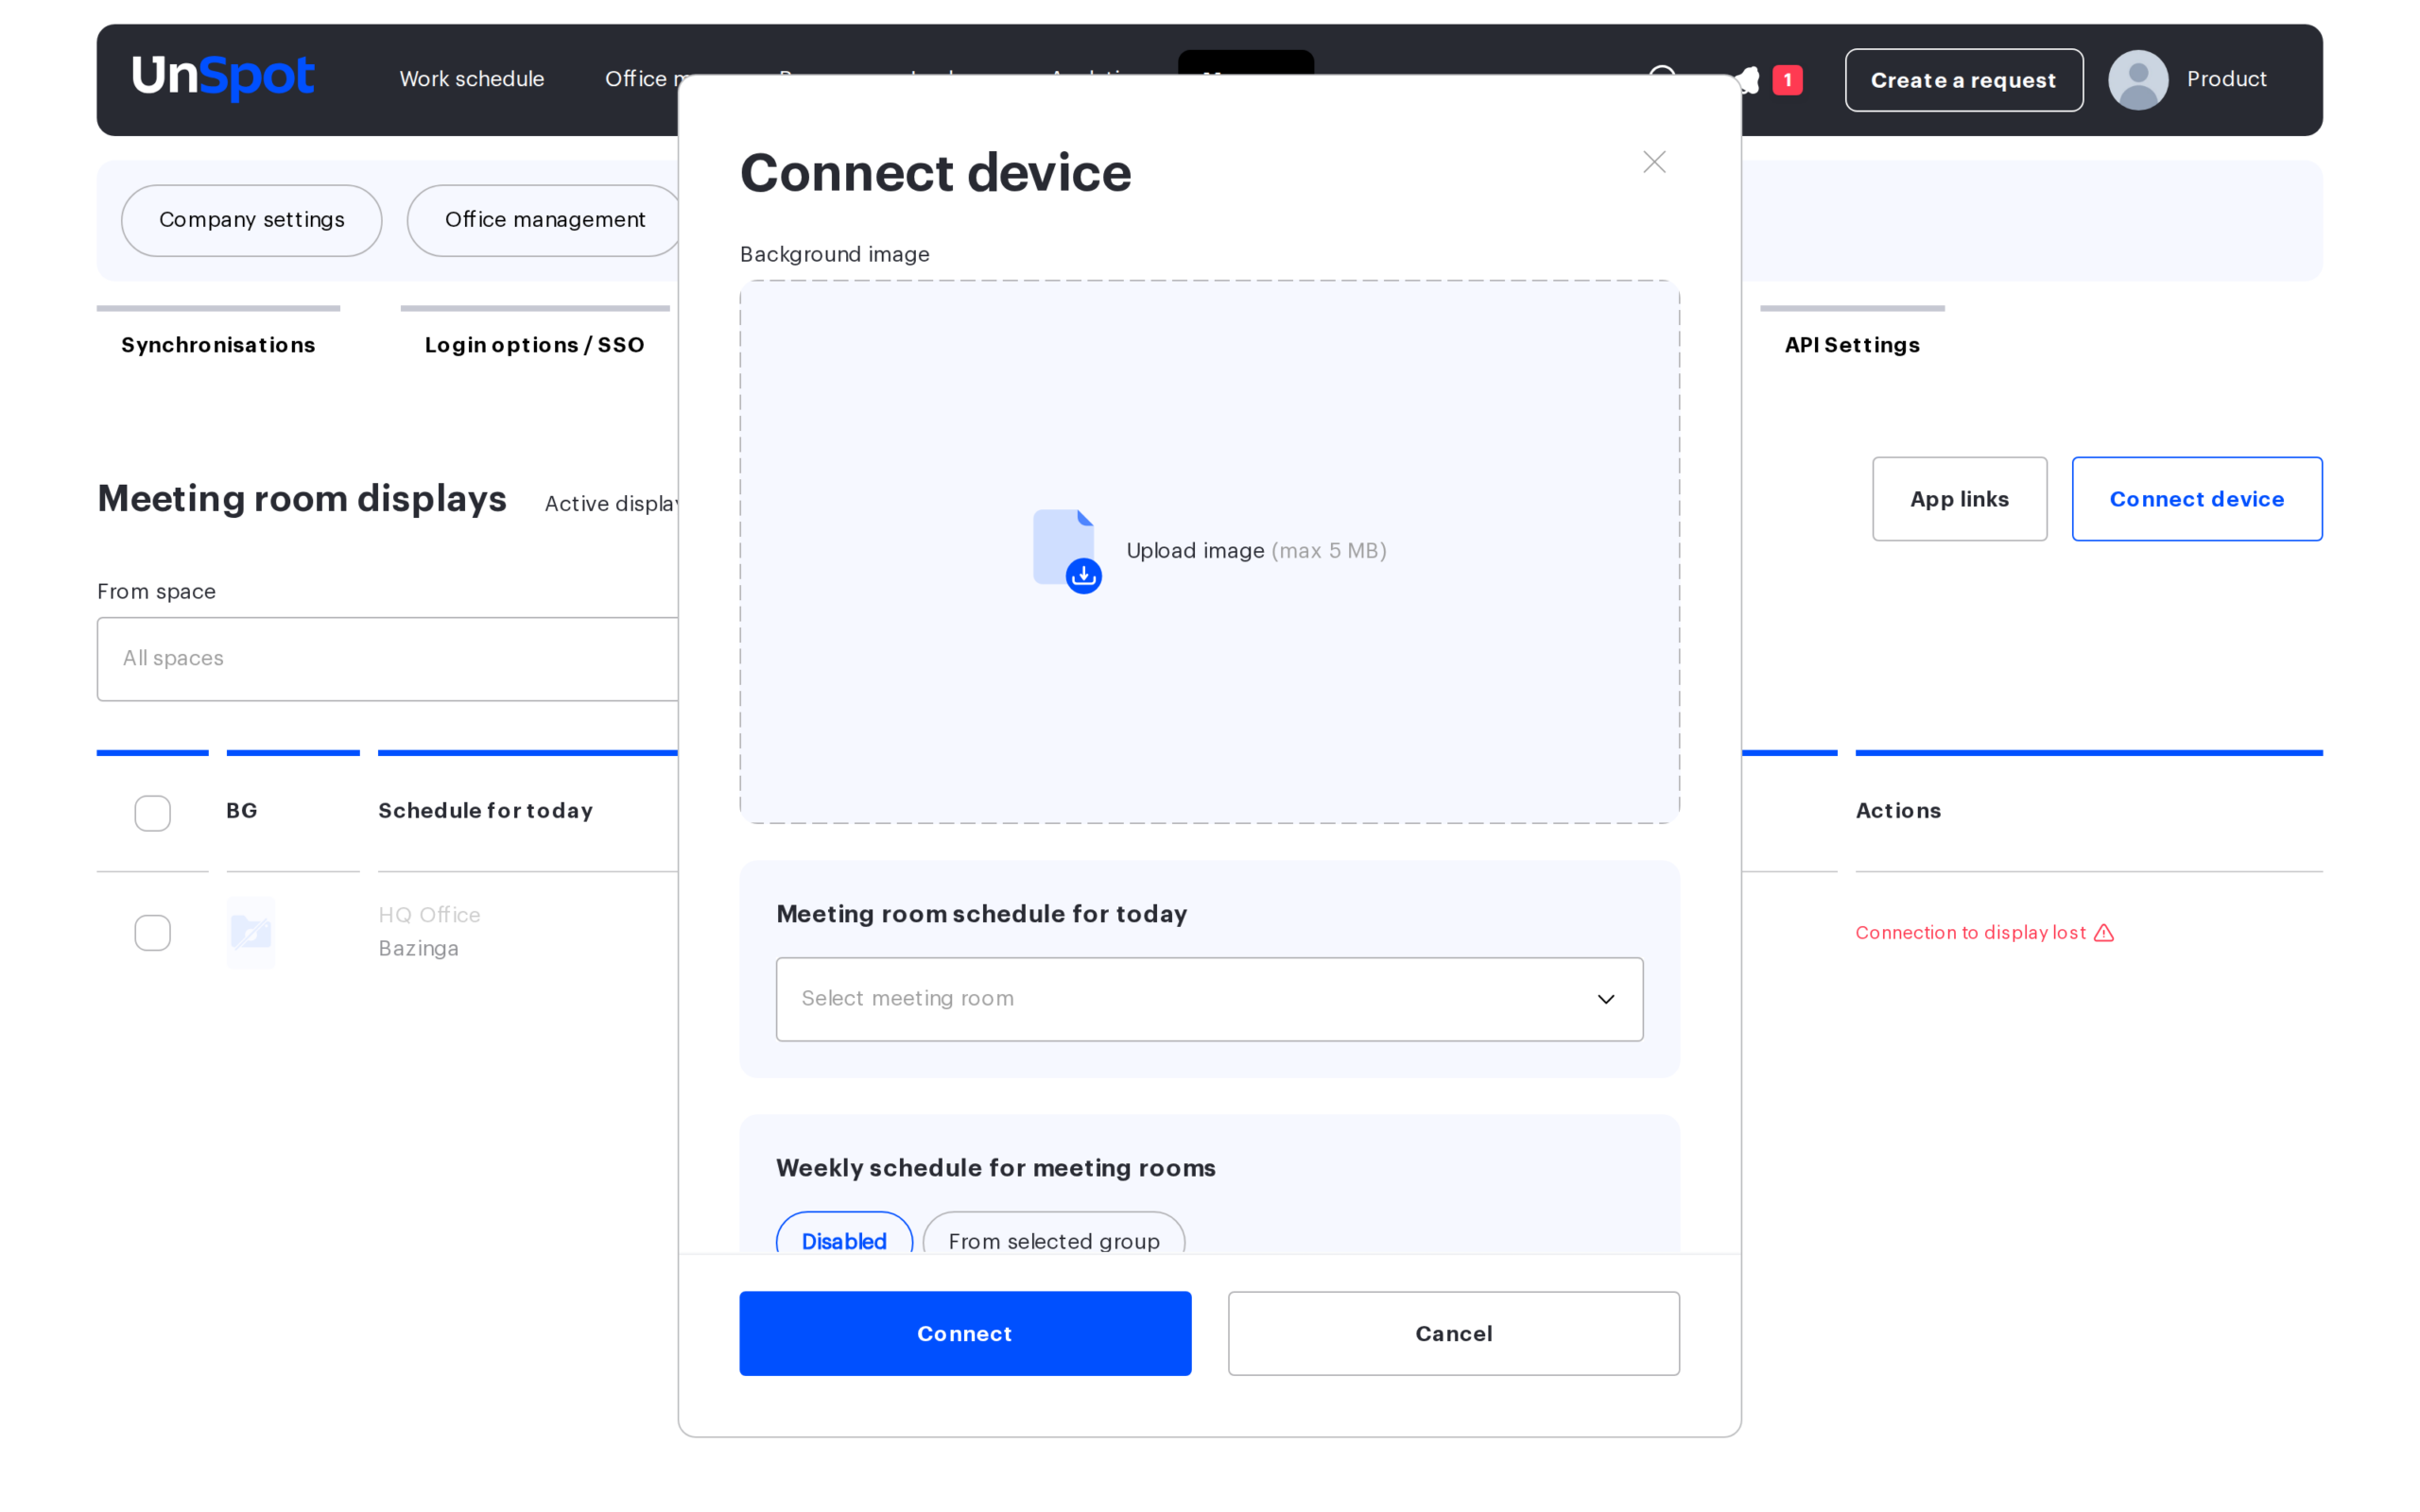
- Click “Connect device”. The display settings form opens.
- Fill in the settings — see the Display settings section for details. All fields are optional: you can change them after connecting.
- Click “Connect”. The “Display connection details” window opens with two values: your company domain in UnSpot — the name of your workspace (for example, company if you open UnSpot at company.unspot.com) — and the activation code for device login — a six-digit code.
⏱ The activation code is one-time and valid for 5 minutes. If you didn’t manage to enter it on the tablet, click “Reconnect” next to the display in the list to get a new code. The display settings are kept.
Step 3. Activate the display on the tablet
- In the app on the tablet, enter your company domain.
- Enter the activation code from the connection window.
- The tablet shows the schedule of the selected meeting room — the display is connected.
From now on, all settings are managed from UnSpot only; the device does not need to be re-activated.
Display settings
The form opens when you connect a device (“Connect device”) and when you edit one (“Edit” in the display row).
| Setting | What it does | How it works |
|---|---|---|
| Background image | Sets the display background — for example, an office photo or a branded image. | JPG or PNG up to 5 MB. The image is cropped to the 16:9 screen ratio on upload. If no background is set, the default one is used. |
| Meeting room schedule for today | Links the display to one meeting room: the screen shows its name, availability status, and the day’s bookings. | Only spaces of the “Meeting room” type are listed (archived rooms are hidden). If no room is selected, the daily screen is off. |
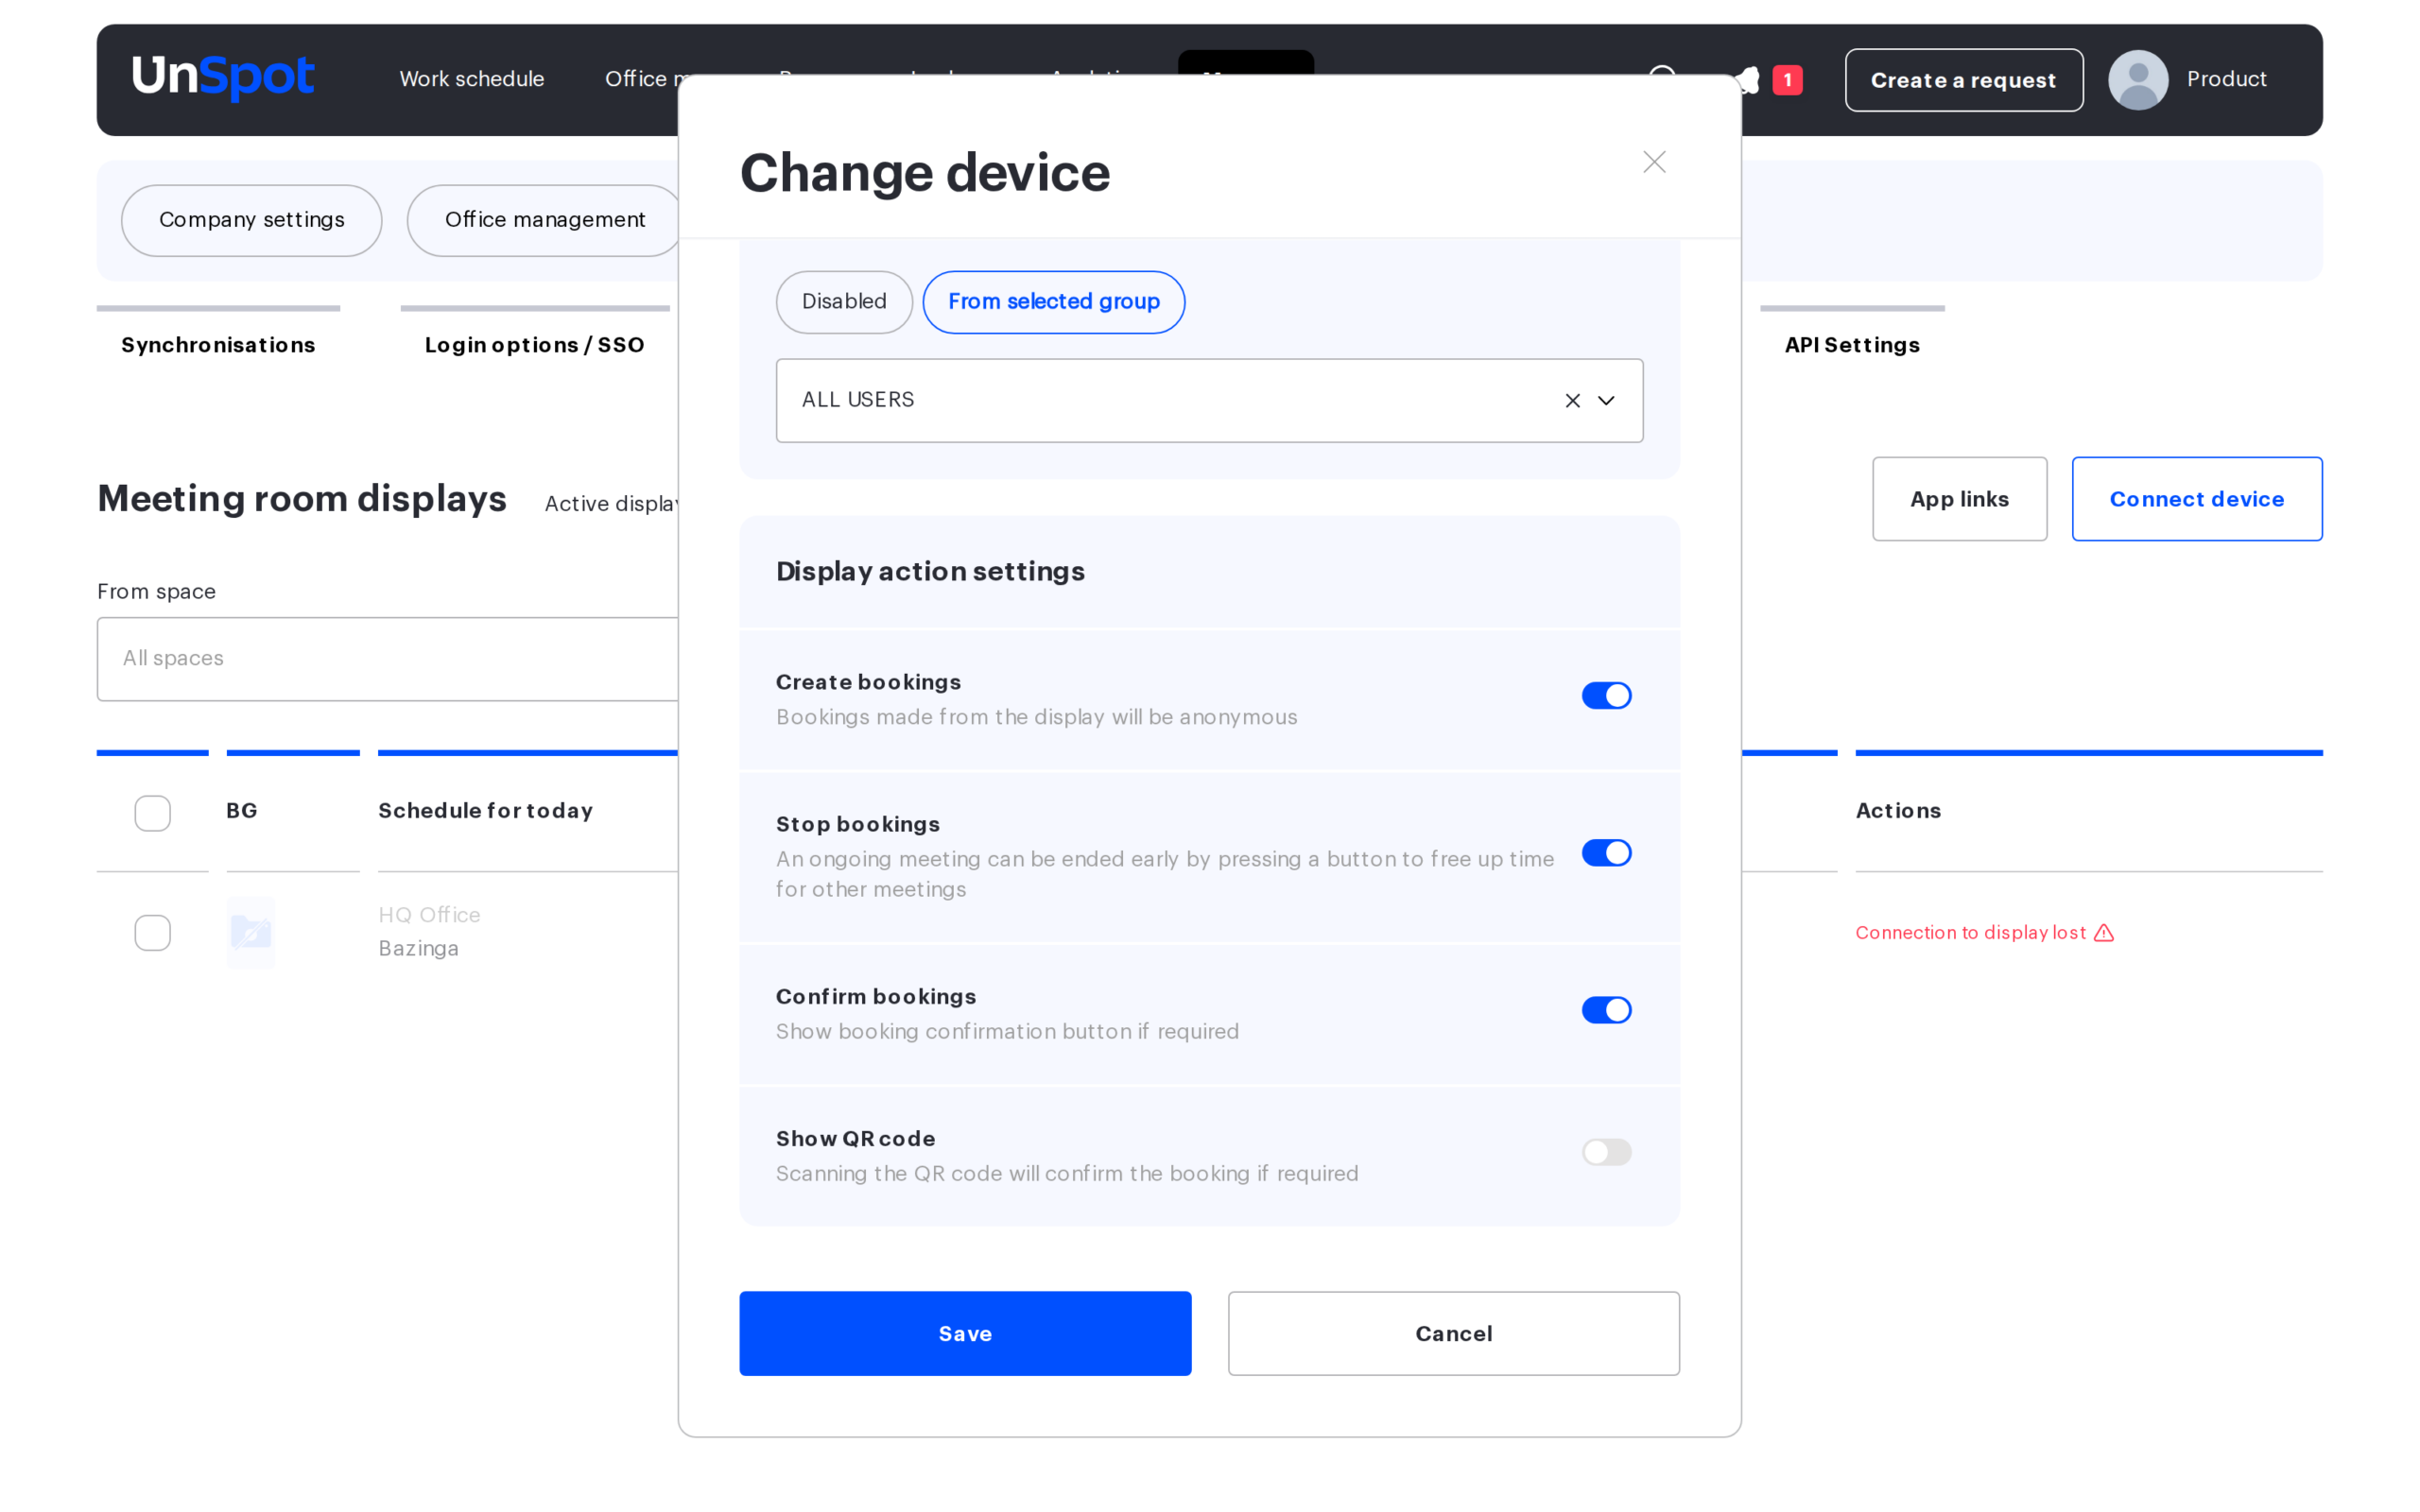
| Weekly schedule for meeting rooms | Enables a weekly availability overview for several meeting rooms. | Choose “From selected group” and pick a group from Groups & Teams — the display shows all meeting rooms of that group. Default: “Disabled”. |
Display action settings
Four toggles define what people can do from the screen. In the display list, enabled actions are shown as Book / Stop / Check-in / QR labels. When you connect a device, all four actions are off — enable the ones you need for this room.
| Toggle | What it does |
|---|---|
| Create bookings | A free meeting room can be booked from the display. Such bookings are anonymous — not linked to an employee. |
| Stop bookings | An ongoing meeting can be ended early with a button on the display to free up time for others. |
| Confirm bookings | The display shows a confirmation (check-in) button when a booking requires confirmation. |
| Show QR code | The display shows a QR code; scanning it confirms the booking when confirmation is required. |
💡 The confirmation button and QR code only work when meeting room check-in is enabled: globally in Manage → Company settings → Check-in policies (see Check-in policies) or locally in the settings of the specific meeting room.
Managing displays
The section page lists all connected devices with the counter “Active displays X of Y” (online out of connected).
- Filters. “From space” — by the office or floor where the display’s meeting room is located; “Available actions” — by enabled actions (Book / Stop / Check-in / QR).
- Edit — opens the display settings form.
- Reconnect — issues a new activation code for the same device. Use it when replacing the tablet or reinstalling the app: all settings and the background are kept.
- Delete — disconnects the display and removes its record (with confirmation).
- Bulk operations. Tick several displays — the “Selected displays: N” panel appears with Edit and Delete. In bulk editing you can “Upload one background for all displays” and “Set the same schedule” for the selected devices.
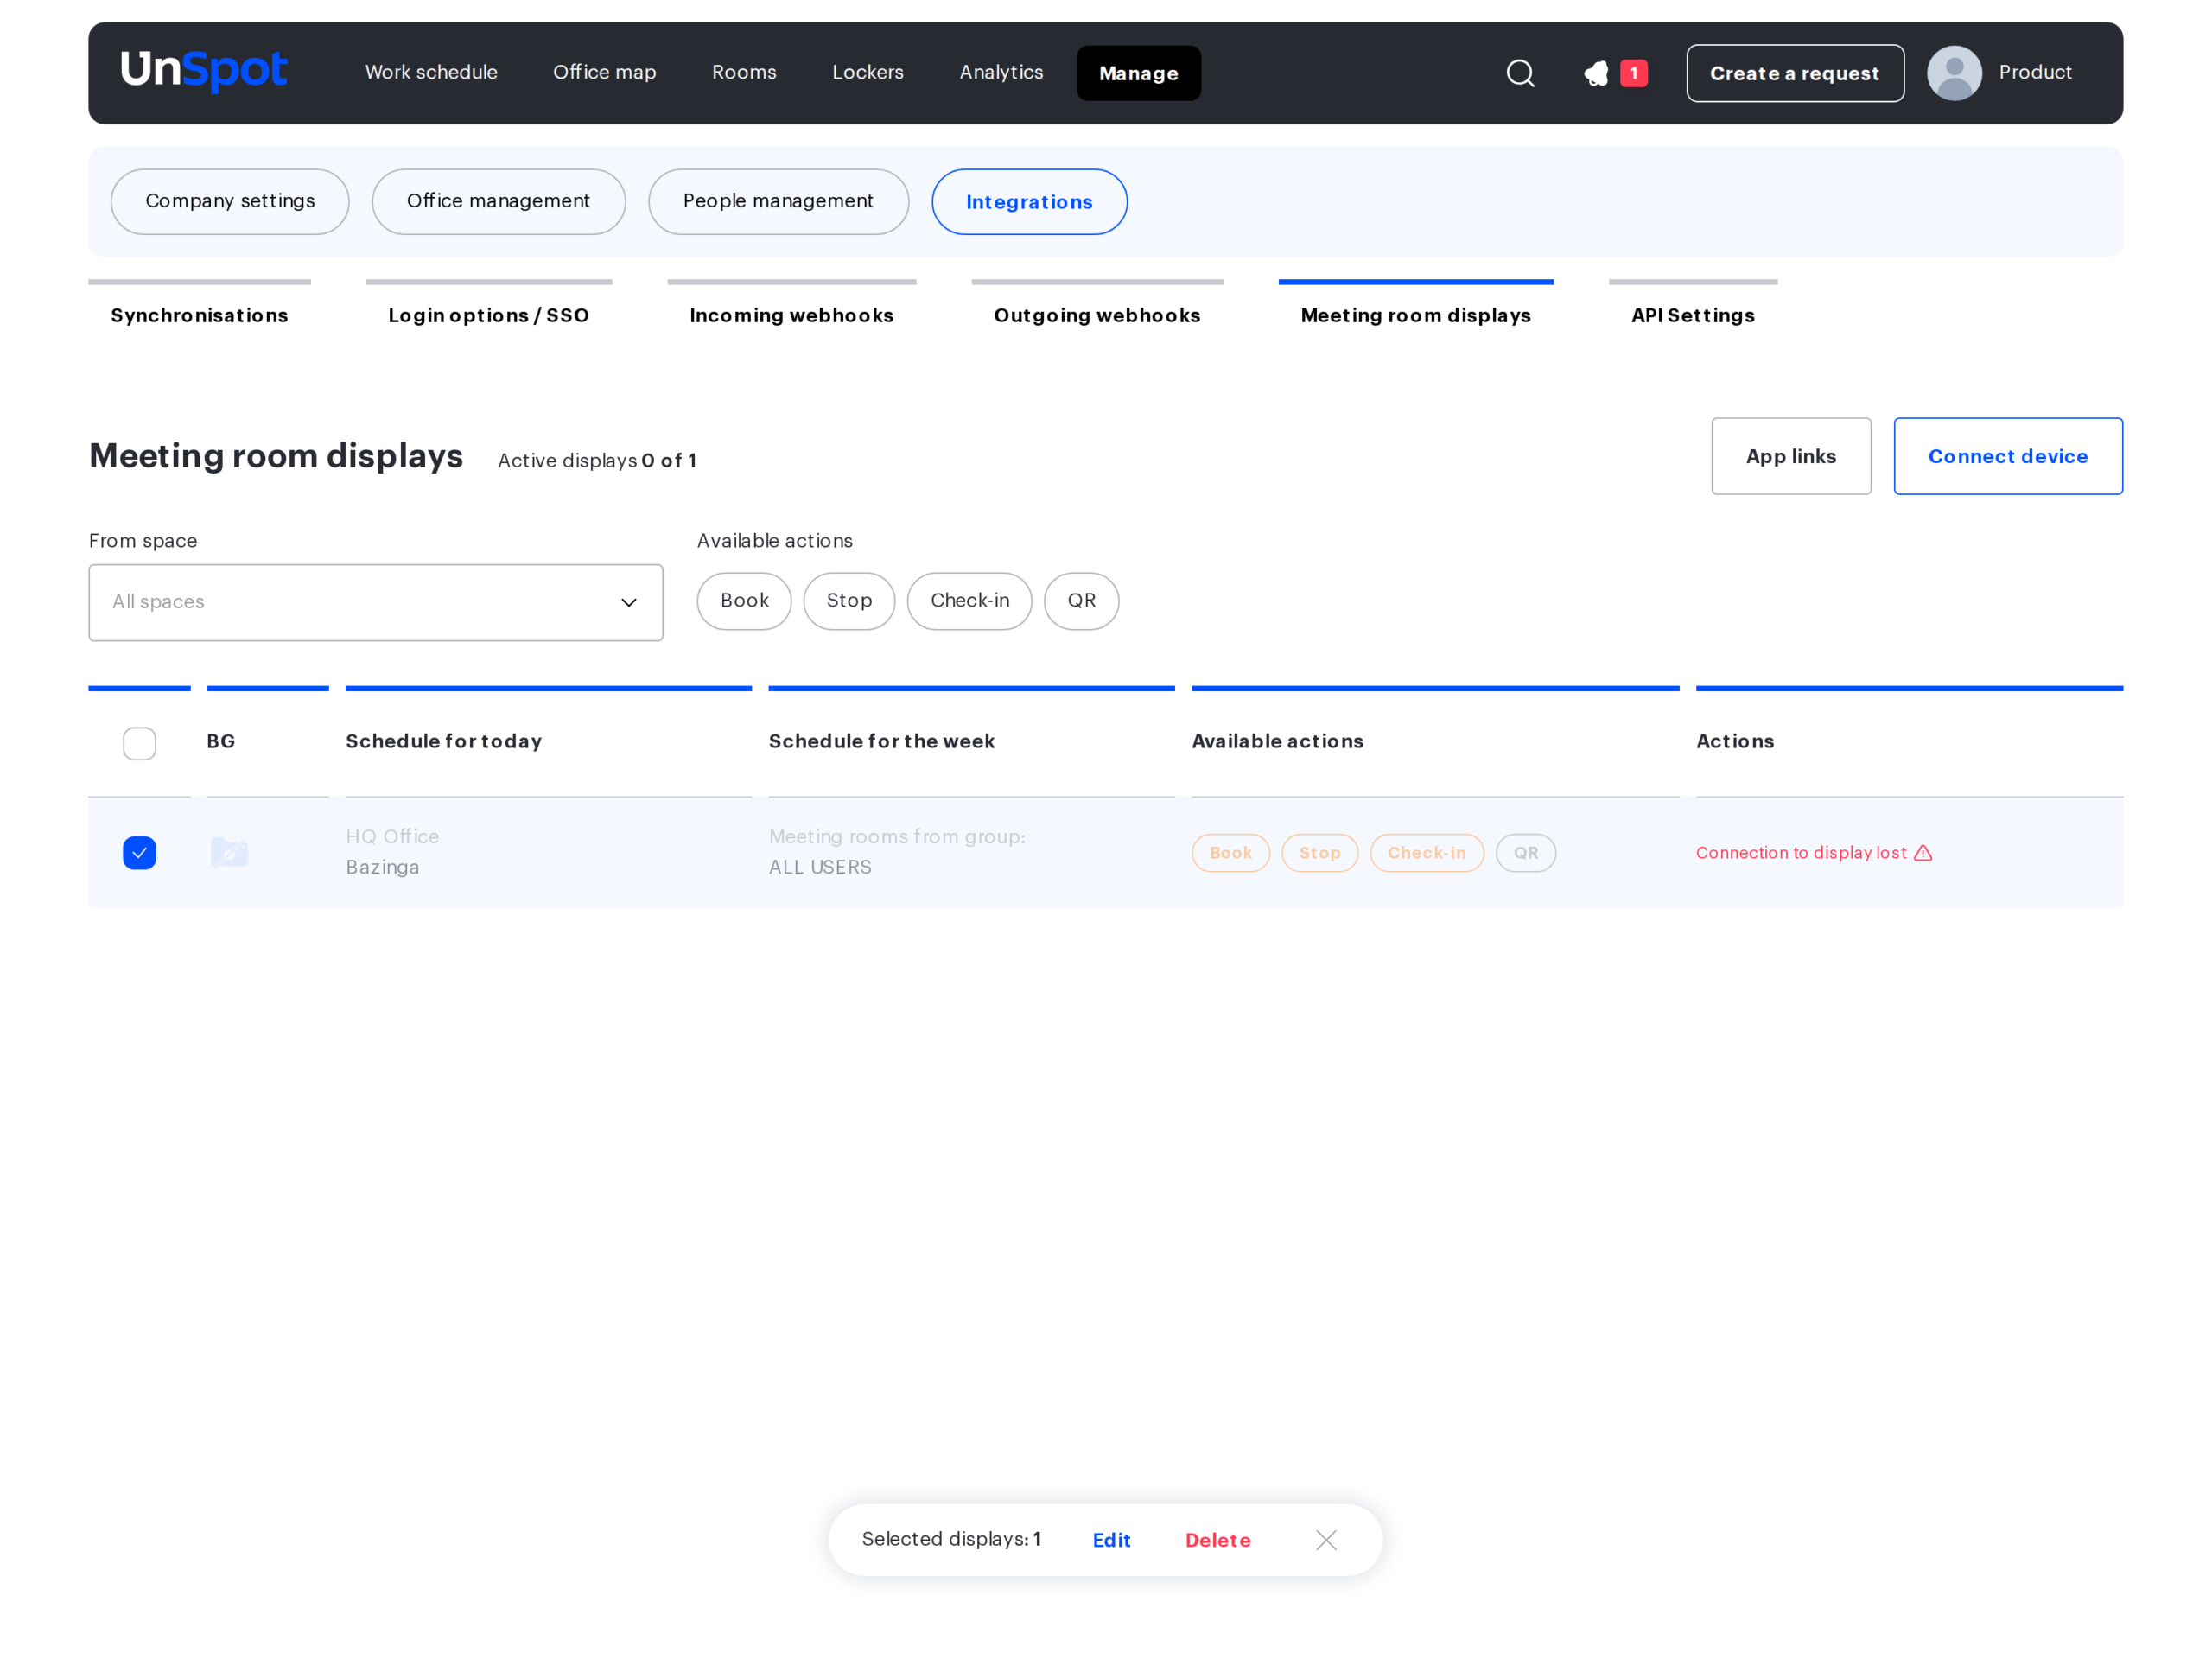
Connection status
The display regularly sends a signal to the server. If there is no signal for about 15 minutes, the status changes to offline and the row shows the “Connection to display lost” warning.
🔔 To get an email when a display goes offline, set up an outgoing webhook for the “Connection to meeting room display lost” event in Manage → Integrations → Outgoing webhooks (see the Outgoing webhooks setting up guide).
Troubleshooting
| Symptom | Cause | What to do |
|---|---|---|
| The activation code is not accepted | The code is one-time and valid for 5 minutes | Click “Reconnect” next to the display and enter the new code |
| The display shows “Connection to display lost” | The tablet is off, has no internet, or the app is closed | Check the tablet’s power and network and open the app; the status returns to online once the connection is restored |
| The meeting room is not in the list | The space is not a meeting room or is archived | Check the space type in Office management; restore the room from the archive |
| There is no confirmation button on the display | The “Confirm bookings” toggle is off (all actions are off after connecting) or meeting room check-in is disabled in the company/room settings | Enable the toggle for the display and check the check-in policies |
| The QR code is not shown | The “Show QR code” toggle is off | Enable it in the display settings |