Connect SSO (OAuth 2.0) via AD FS
In the article:
1. Configuring Active Directory Federation Services (AD FS):
Creating a Company Application in AD FS
Rule Creation
2. Configuring Single Sign-On (SSO)
Configuring SSO OAuth 2.0 authorization in UnSpot
UnSpot can communicate with Active Directory Federation Service (ADFS) via SSO (Single Sign-On) to provide automatic user authentication.
The interaction between UnSpot and ADFS via SSO provides ease of use for users because they do not need to enter credentials each time they access UnSpot resources, and enhances security by providing authentication based on a strong identity system such as Active Directory.
1. Configuring Active Directory Federation Services (AD FS):
Creating a Company Application in AD FS
- Go to the AD FS application and select the Application Groups folder, in the side menu Actions > Add Application Group
- Enter a Group Name and select Web Browser accessing a web application (site connection) in the Template and click Next
- Keep the Client ID that appears (generated automatically).
- Add the Redirect URI https://auth.unspot.com/api/oauth2/verify and click Add so that it appears in the box below and click Next
- Select the Access Control Policy: Permit Everyone and click Next
- Check the Summary and click Next and your Application Group has been successfully created. Close and return to the Application Groups window.
Rule Creation
The next step is to create a rule to define the information that will be contained in the token:
- Select the application group you created, and from the right menu, click Properties
- In the Applications window, select Web Application > Edit
Select the Client Permissions tab and check or uncheck the openid check box - In the Issuance Transform Rules tab > Add Rule, then select the rule type from the Send LDAP attributes as Claims and click Next
- Enter the Claim rule name, select in Active Directory attribute store, map the attributes correctly (see below), click Finish and apply all changes.
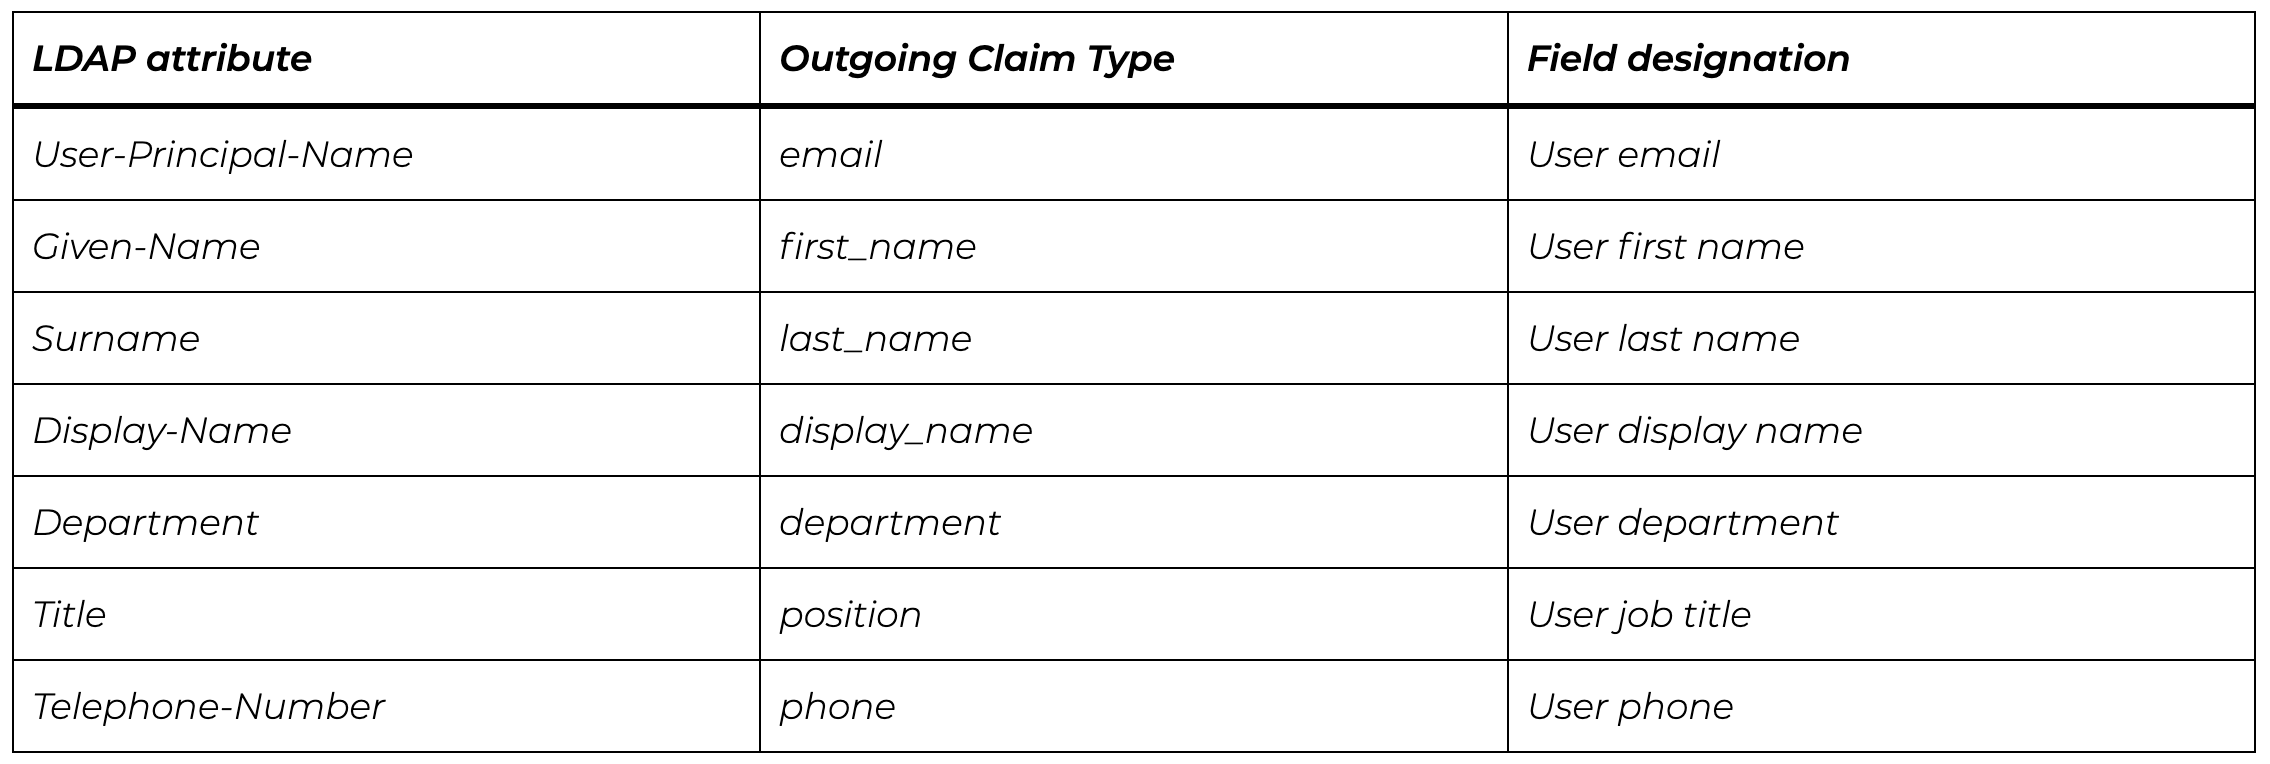
🔹 Attribute Mapping:
To successfully migrate a user with all his/her data from AD FS to UnSpot, you need to set up mappings.
You need to map LDAP attribute (left column) to Outgoing Claim Type (right column of the Configure Rule window). The third column below is given to indicate what is stored in these fields.
In the LDAP column, select the desired attributes in the pop-up window, and in Outgoing Claim Type, fill in by yourself the values that are listed in the table. The outgoing claims type always starts with a lower case character.
Important: In order for a user to be created via AD FS, email must be present. If there is no first name and/or last name, the empty fields will be filled with information from email.2. Configuring Single Sign-On (SSO)
Configuring SSO OAuth 2.0 authorization in UnSpot
If integration with AD FS is configured, then logging into UnSpot will add the ability to log in using on-premises AD accounts.
To connect the integration:
- Go to Manage > Integrations > Login options/SSO in your UnSpot account
- On the page, find Organization authorization providers and click Connect to OAuth 2.0
Important:
To fill in data such as LoginUri or JWKs, you can use the link by replacing <your ADFS domain>:
https://<your ADFS domain>/adfs/.well-known/openid-configuration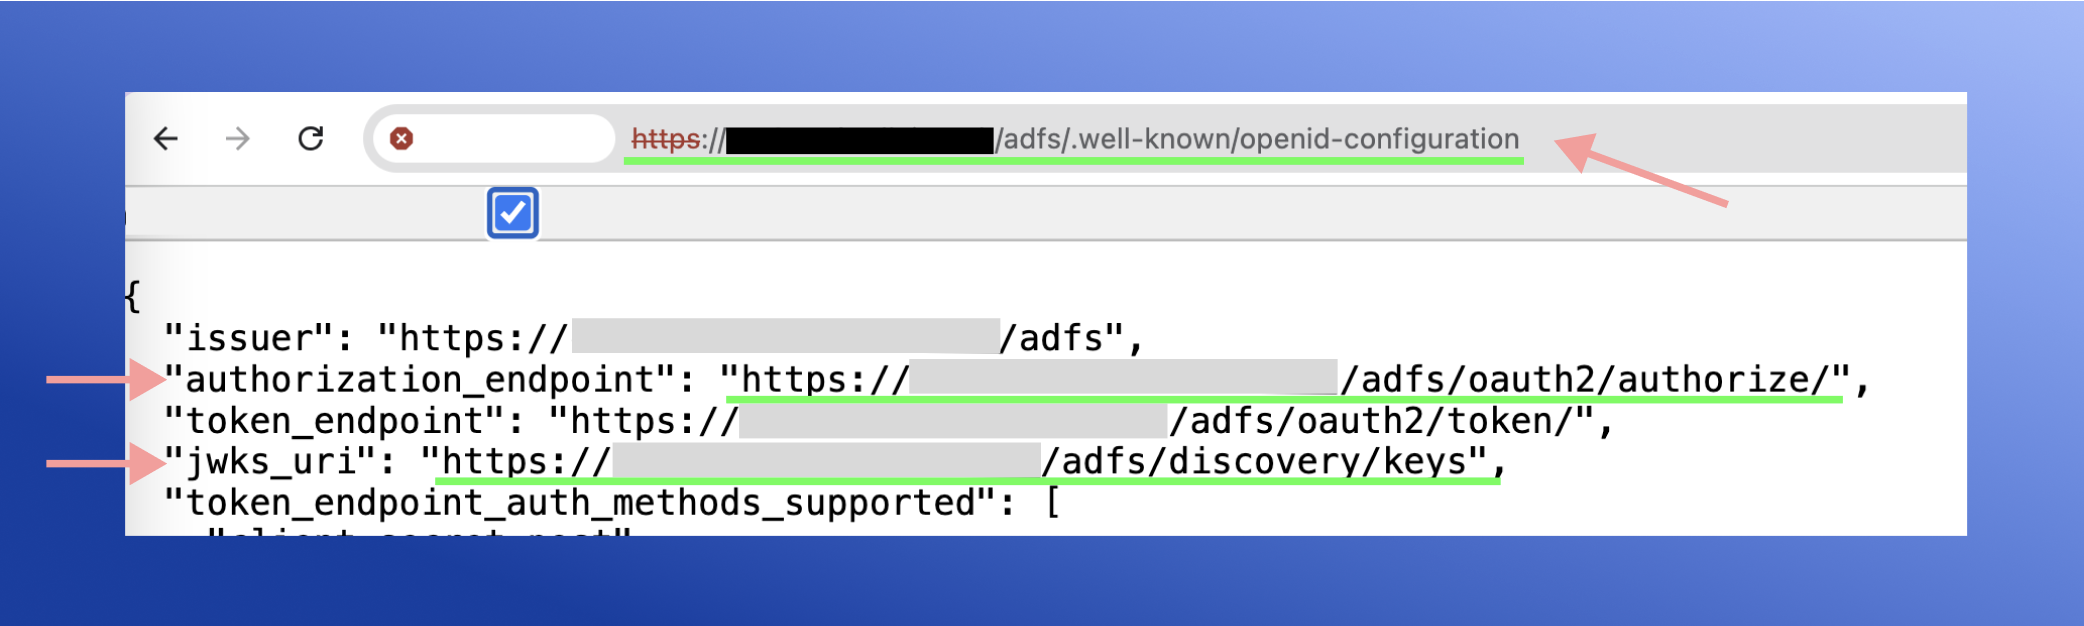
Fill in the details:
clientId– client ID that you saved from AD FSLoginUri– enter the link- Example: https:// <your ADFS domain> /adfs/oauth2/authorize
JWKs type– authentication of access tokens- if you want to insert a link > select
Url, - if you want to insert keys manually > select
Keys
- if you want to insert a link > select
JWKs– depending on the selected JWK type, paste the link or copied keys from the link.- Example: https:// <your ADFS domain> /adfs/discovery/keys
Name OAuth 2.0– will be displayed on the connect button when you log in to the applicationImage OAuth 2.0– will be displayed on the connect button when you login to the application. Image size limit: 64px*64px.Response type– Id token. Select this response type to integrate with AD FS. AD FS returns a JWT token that contains transmitted user data (first name, last name, mail, and other transmitted data) that can be used to create an account in the system.
Click Save > OAuth 2.0 successfully connected.
To disable OAuth 2.0, click Disconnect
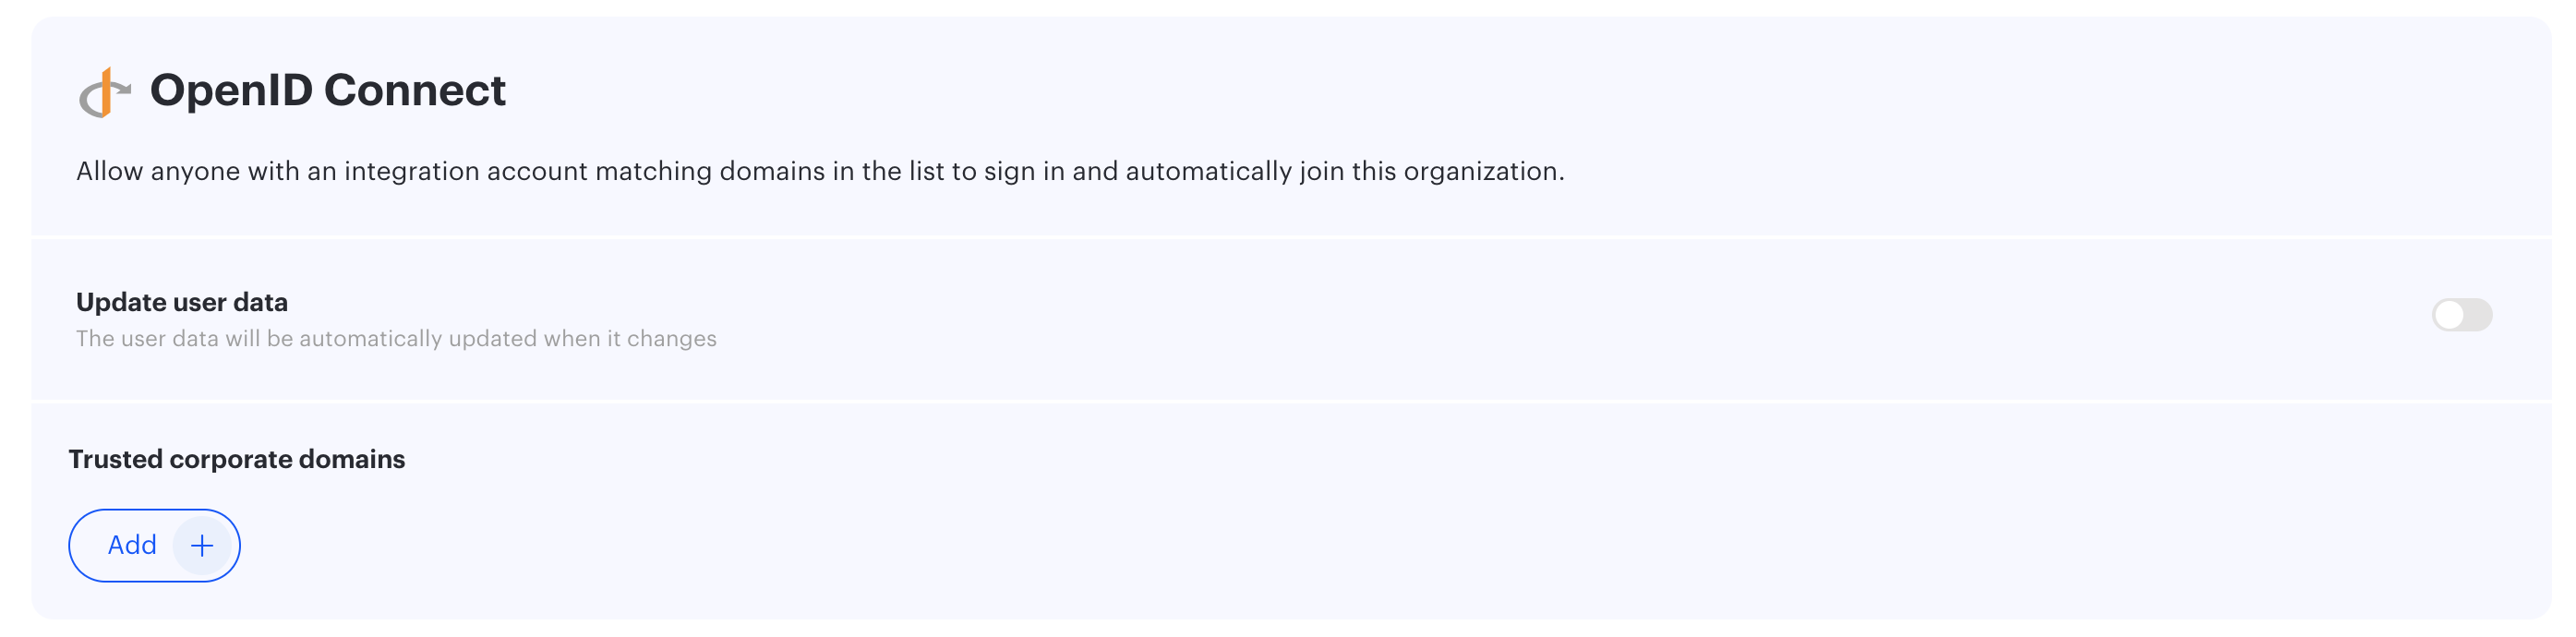
Important: To automatically log employees into UnSpot and import data from AD FS, you must add the company's corporate domain in Manage > Integrations > Login options/SSO > OpenID Connect