Guidelines for Standard holder installation
When you purchase the holder, you get a kit consisting of an upper and lower frame, and also mounting screws and hexagon drives.
Before starting to mount the holder, it is necessary to determine its location on the wall. It’s important to have a socket or network equipment next to the place of mounting the module.
After you have chosen the mounting location for the holder, you need to align the holder parallel to the floor using a laser level, with the lower border of the holder to be at a height of 145 cm from the floor.
Outline the location of the frame on the wall with a pencil (145cm from the floor)
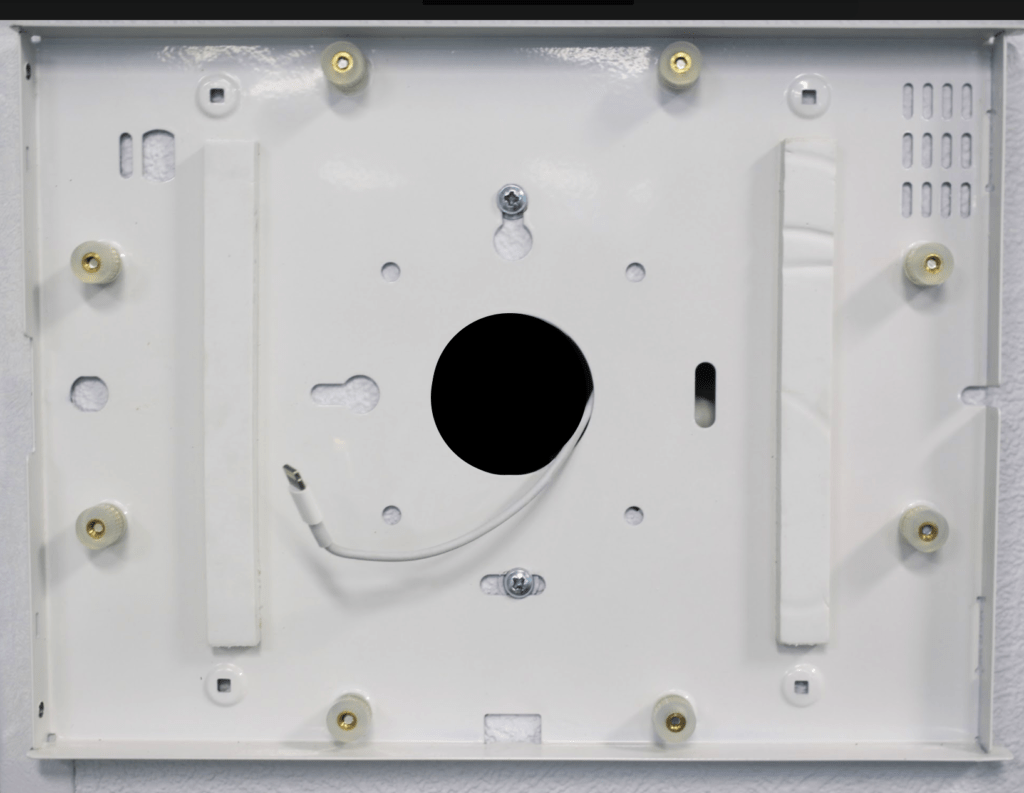
Next, you need to ensure the continuous iPad charging by supplying power to it. The Standard holder does not have a built-in power supply, so it is connected via a Lightning cable.
To connect in this way, you need to have the following before installation:
- Lightning cable 3m
- IPad charging dock (included with iPad)
- Power supply (socket)
It is recommended to lead out the cable hole at the height of 156 cm from the floor, so it will be right in the middle of the holder. We cut out a hole and put one edge of the Lightning cable into it, which will be connected to the iPad, the other edge is connected to the iPad power supply, which, in turn, connected to the socket.
When installing sockets, you should take into account the following: the maximum length of the Lightning cable, which ensures continuous power supply to the device, is 3 meters, so the socket must be located within this range.
There are 2 options for its location:
- In the wall directly behind the holder
This option is suitable for you if the distance between the main wall and the finishing material is at least 10 cm. This is necessary so that the charging unit can freely enter and be ventilated to avoid heating. For this you need to make a hole of 10 cm in diameter, where the iPad power supply will be connected next. - On the ceiling
If you do not have enough space between the main wall and the finishing material, then it is possible to install a socket in the ceiling, for example. To do this, you need to prepare a hole with a diameter of 5 cm. The iPad charging unit is plugged into the socket, the Lightning cable is passed in the wall / between the main wall and the finishing material, or installed in a cable channel.
After you have decided on the option of connection, you need to fix the holder to the wall. To do this, it is enough to perform a few steps:
1. Please fasten the back frame with screws according to the previously outlined marks using a screwdriver or a screw gun.
2. Then insert the iPad into the lower frame and connect it to the power supply.
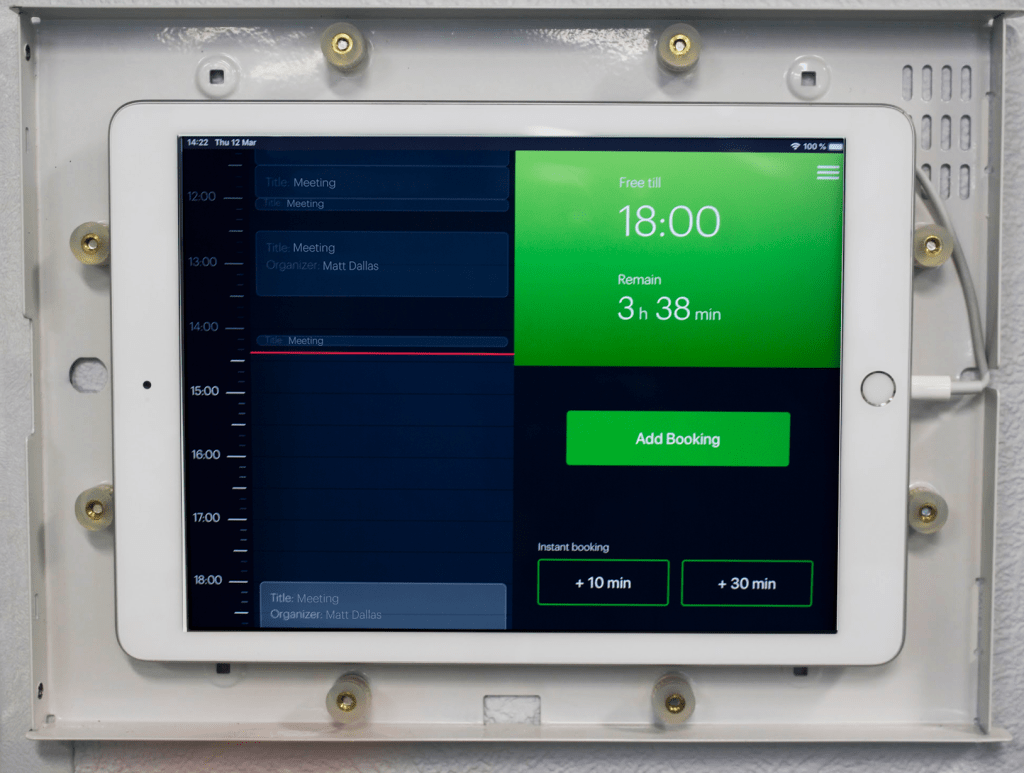
3. The next step is to install the upper frame. Please snap it onto the base and screw it on the sides with the bolts included into the kit. This is what the ready-made booking system looks like:
