Guidelines for Premium holder installation
When you purchase the holder, you get a kit consisting of an upper and lower frame, a built-in PoE adapter, and mounting screws and hexagon drives.
Before starting to mount the holder, it is necessary to determine its location on the wall.
After you have chosen the mounting location for the holder, you need to remove the upper frame.
Then, using a laser level, align the holder parallel to the floor, with the lower border of the holder to be at a height of 145 cm from the floor.
Outline the location of the frame on the wall with a pencil, as well as the place where the twisted pair cable will be brought out – a hole of 1 cm in diameter, the center of which is located in the upper right corner at a height of 164 cm from the floor.
iPads should always be plugged in. The Premium wall mount has a removable built-in POE-adapter, so you can connect iPad to an electrical grid or via ethernet cable.
Connection to network equipment. What do you need to have before installation?
- Twisted pair cable.
- 24V PoE Network Equipment (SWITCH).
Since this holder already has a built-in 24V PoE adapter, you only need to pull out one end of the cable in the place where it will be installed and connect to the PoE adapter, and connect the other end to the network equipment.
NOTE! When connecting this device to network equipment, please take into account that it is powered by 24 V. If your equipment has only PoE 48V, you need to purchase a 48V to 24V step-down splitter.
Connection to a socket. What do you need to have before installation?
- Twisted pair cable.
- Power supply (socket).
- PoE power supply 24V.
You should connect one end of the twisted pair cable to the 24V PoE adapter, and the other end to the PoE power supply and plug it into a socket.
After you have decided on the option of connection, you need to fix the holder to the wall. To do this, it is enough to perform a few steps:
- We take the drywall dowels that come within the kit and attach them to the wall at the place where we previously have made the marks.
- Then we fix the back frame with screws using a screwdriver or a screw gun.
- The next step is the preparation of the upper frame: first you need to dismantle the screws, then insert the iPad and screw them back.
- Next, we connect the Lightning cable to the iPad, insert the upper frame of the holder into the lower one, tighten the bolts from above for a secure fit.
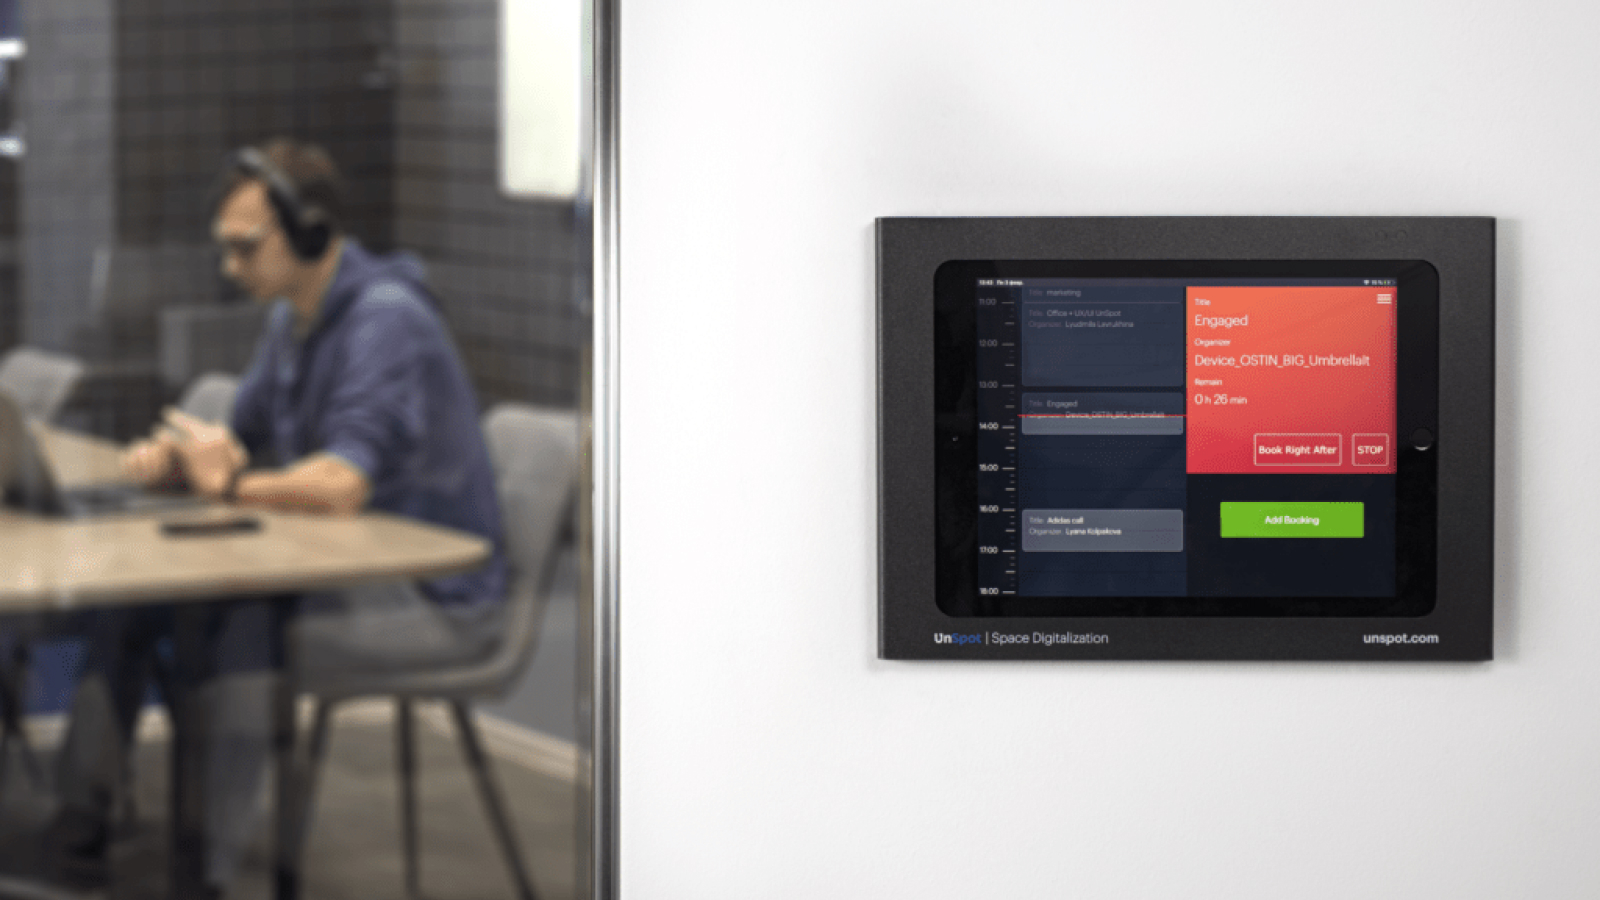
The ready-made booking system looks like as follows: