
Printing the office map
The office map can be printed straight from the editor: colour the plan by usage type or by department, switch labels on and off, and send the result to the printer together with a legend. This article covers the Print mode and its settings.
Opening the Print mode
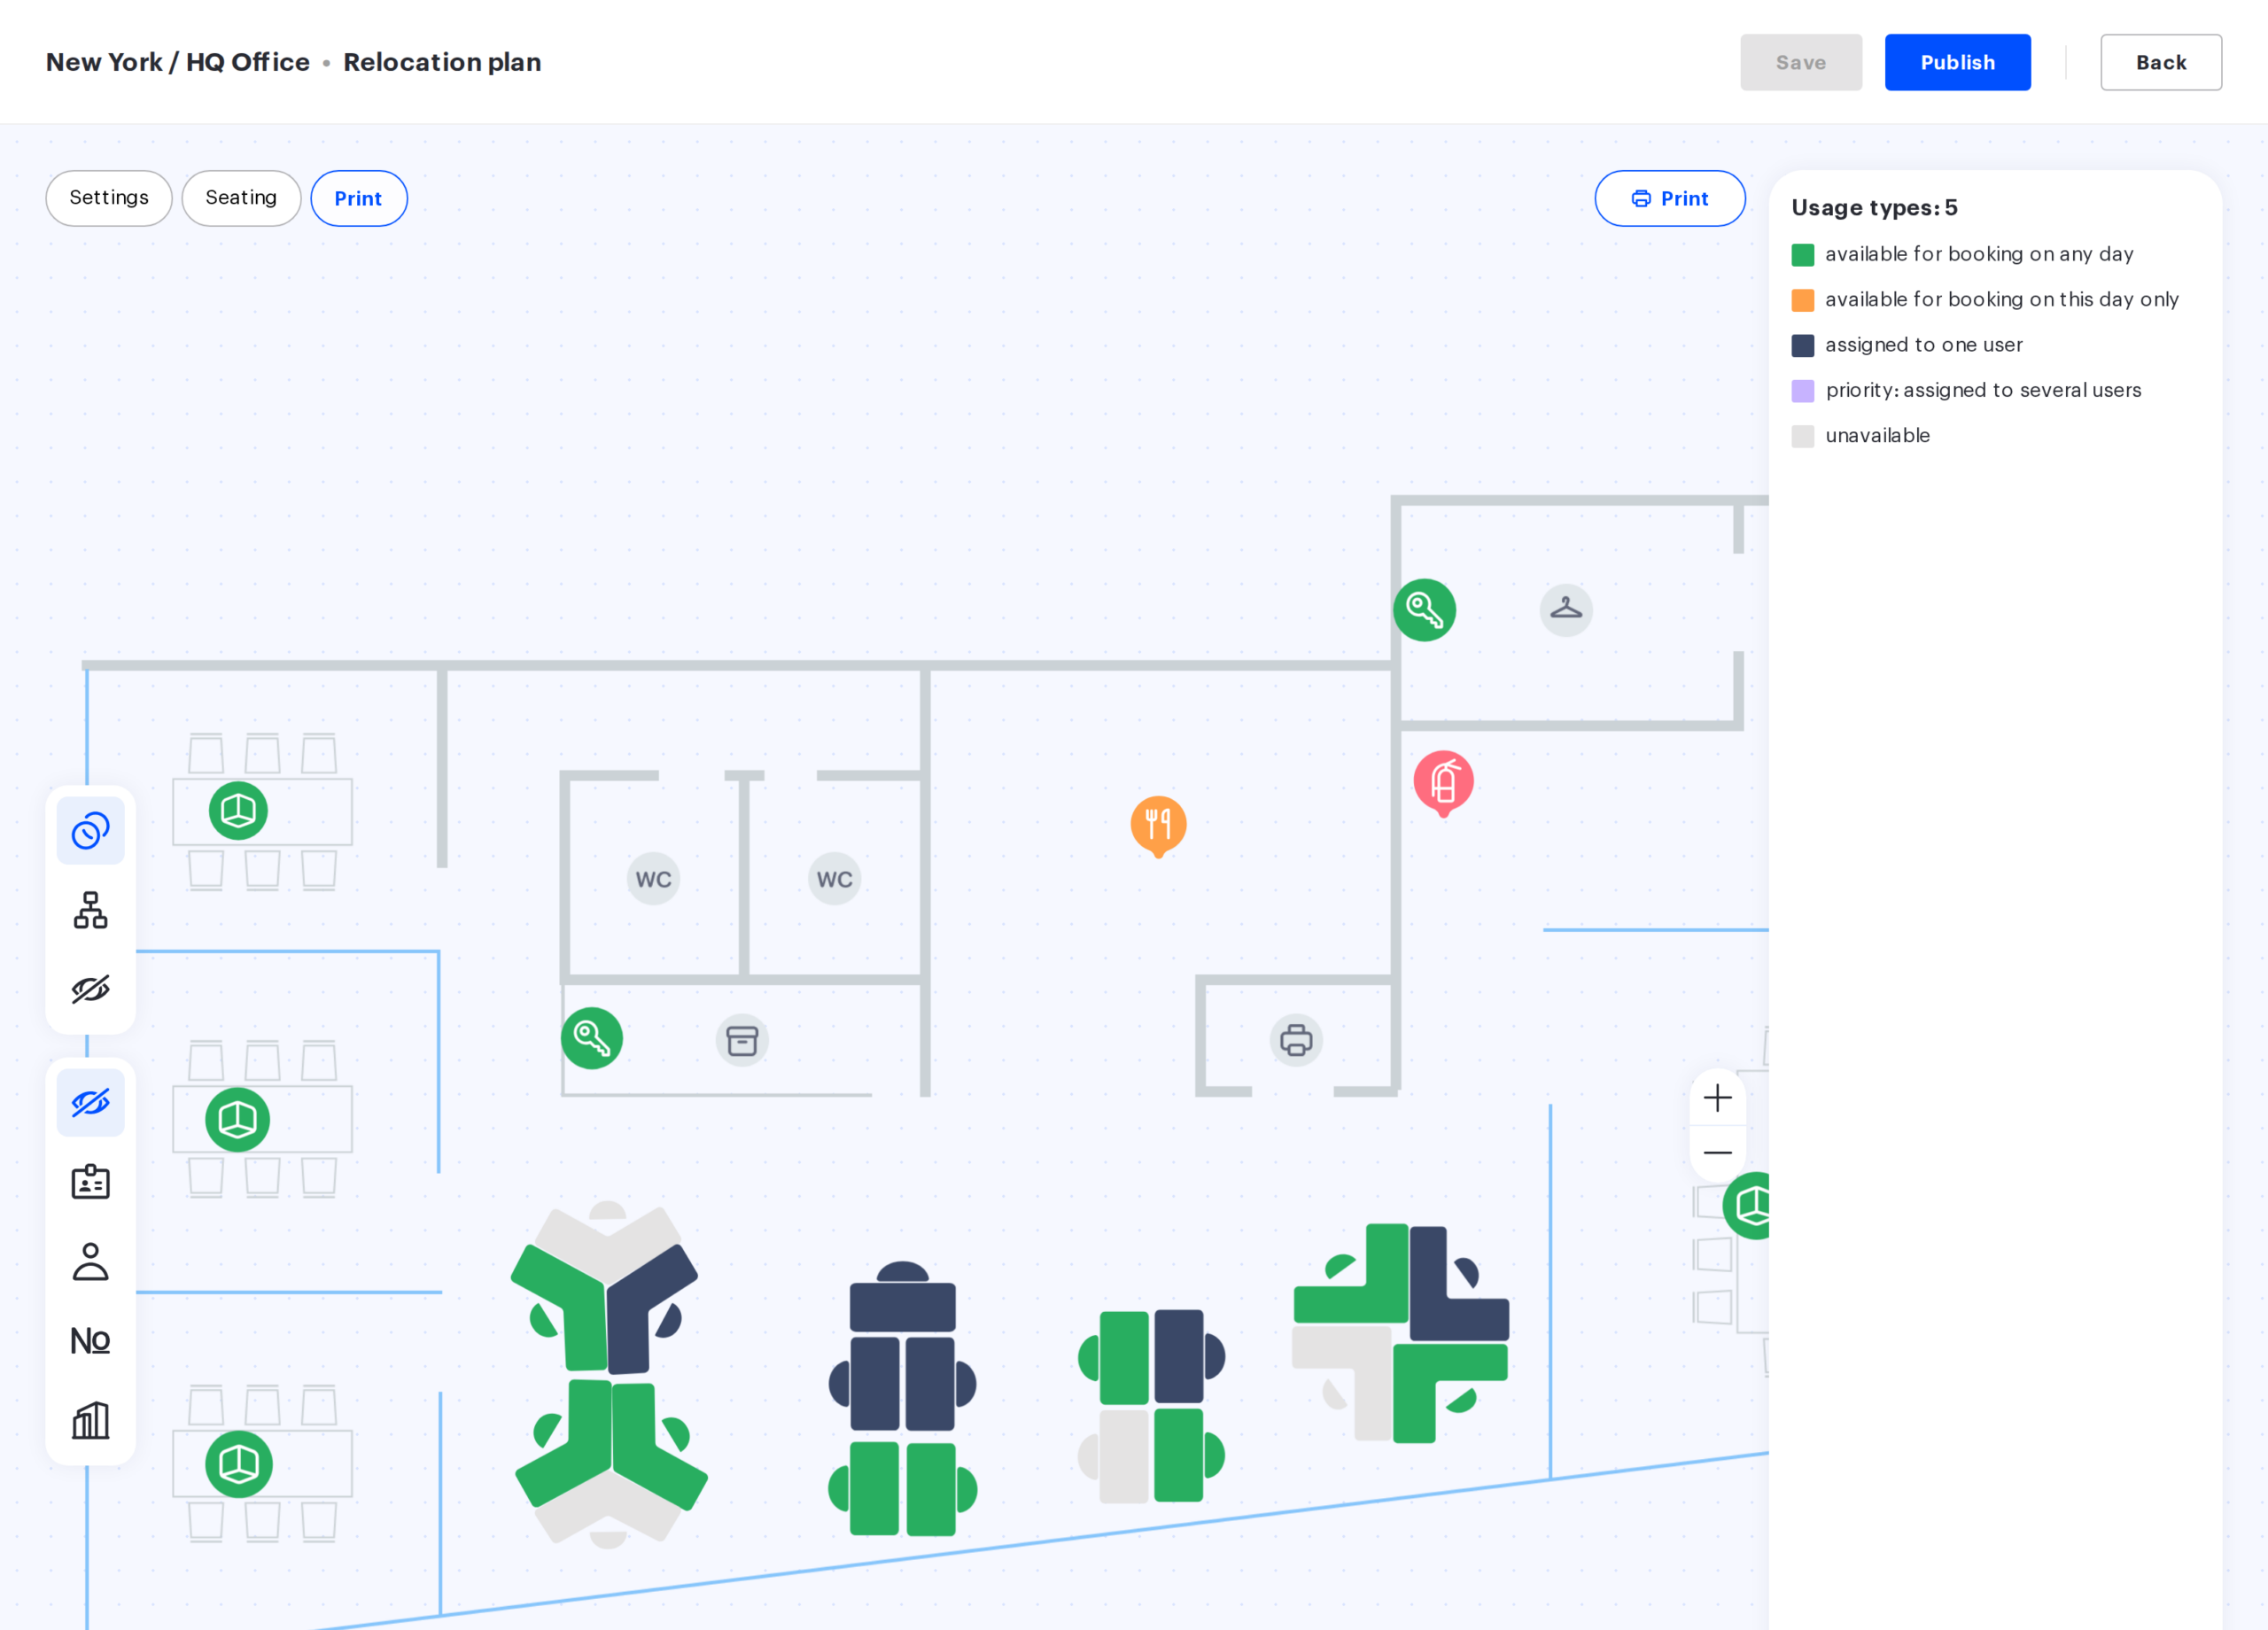
Print is one of the three modes of the map editor, and the switches are at the top. If the floor plan is already uploaded, the editor opens in Settings, so you have to switch to Print manually. Print settings change nothing in the map itself: the layout and the object parameters stay untouched. Zooming and leaving the editor work as in the other modes — see “The panel on the right” and “Leaving the editor and saving”.
Selecting the print area
The Print button in the editor header first asks what goes on the page — the “Select print area” dialog:
| Option | What gets printed |
|---|---|
| Print office plan only | The floor plan with objects in the chosen styling |
| Print office plan and notes | The same plus the notes block on the right |
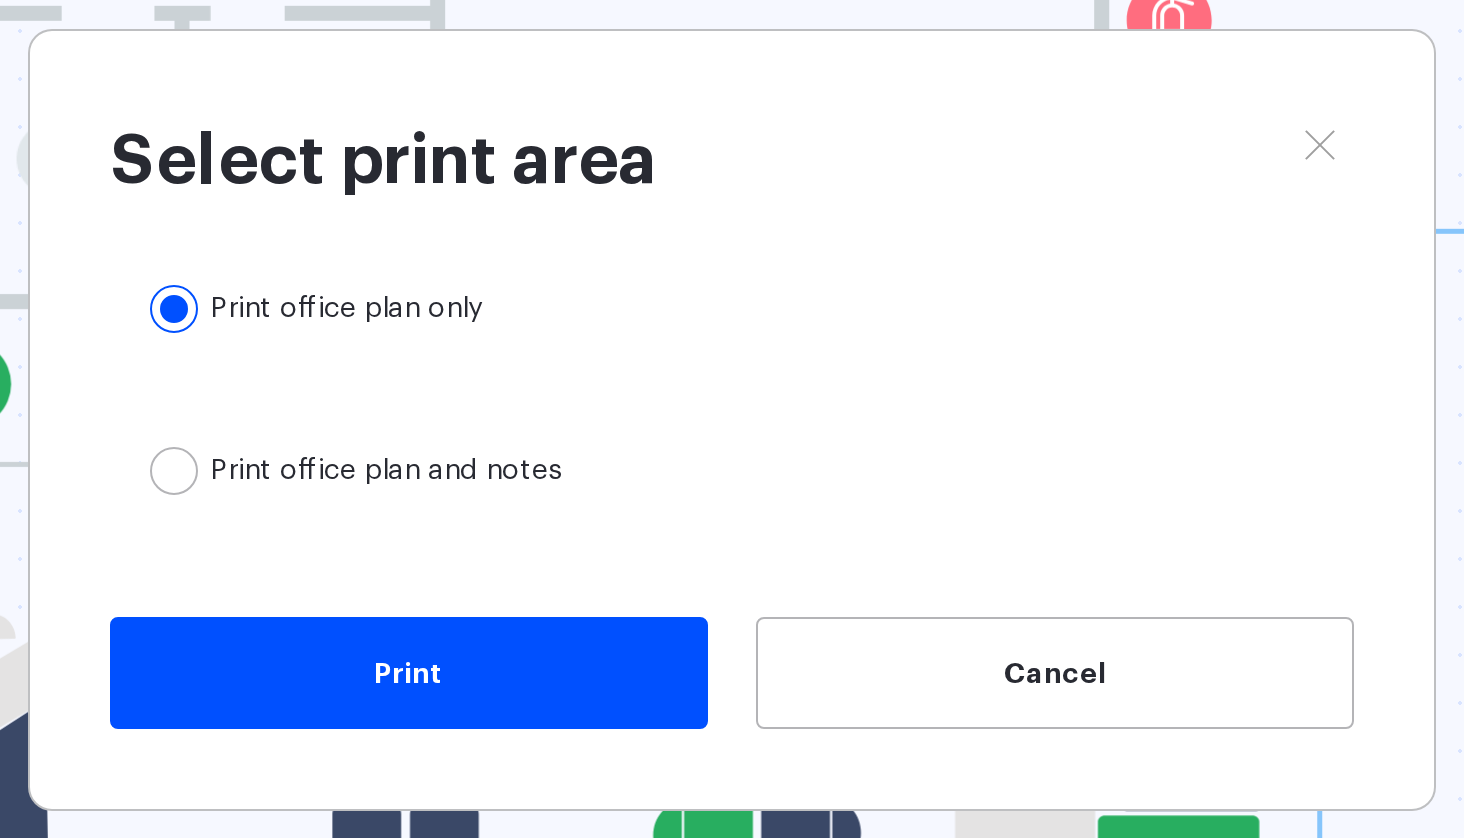
If there are no notes on the screen — the “Hide color labels” scheme is selected, or in the “Departments” scheme the map has no desks or parking spaces at all — the “Print office plan and notes” option is disabled. Once the area is chosen, the ordinary browser print dialog opens: the plan is prepared for A4 in landscape orientation at 300 dpi. The editor has no separate PDF or image export — to get a file, choose “Save as PDF” in the browser dialog.
Colour schemes
On the left, vertically centred, there are two groups of icons: the upper group of three sets the colour scheme, the lower group of five switches labels on. The names of the buttons are visible in tooltips on hover. Colour schemes are mutually exclusive — exactly one is always active.
| Scheme | How the map is coloured | When it helps |
|---|---|---|
| Usage type | The colour shows how a desk or parking space is used: freely bookable, assigned, unavailable | The default scheme: understanding what is going on with the desks in the office |
| Departments | Every department gets its own colour, all desks and parking spaces of a department are coloured the same. Desks and parking spaces with no department stay grey | Showing where each department sits |
| Hide color labels | All desks and parking spaces are one neutral colour | When you need a clean plan of the premises with no semantic colouring |
The icons of meeting rooms, nested workspaces and points of interest do not depend on the chosen scheme and always look the same.
Labels on the map
The lower group of five buttons switches labels on and off:
| Control | What it shows | When the label is not displayed |
|---|---|---|
| Hide all labels | Leaves only the shapes of the desks, with no names, avatars or titles | — |
| Assigned employee names | The employee name in the “J. Smith” format, or the group name, on a desk or parking space | If there are no assignments, or several employees or groups are assigned |
| Assigned employee avatars | The employee photo on the place; without a photo — a coloured circle with the initials | If there are no assignments, or more than one employee is assigned |
| Place names | The names of desks and parking spaces | — |
| Workspace names | The labels of nested workspaces, meeting rooms, lockers, pods and points of interest | — |
“Hide all labels” and the other four controls are mutually exclusive: switching any of the four on clears “Hide all labels”, and the other way round. By default the Print mode has the “Usage type” scheme selected and only “Hide all labels” switched on — that is, a clean map coloured by usage type.
The legend on the right
When a colour scheme is on, the explanation is shown to the right of the map. For the “Usage type” scheme these are five values:
- available for booking on any day;
- available for booking on this day only;
- assigned to one user;
- priority: assigned to several users;
- unavailable.
For the “Departments” scheme the explanation shows the colour of every department, and if there are many of them the list scrolls. If the map has desks or parking spaces with no department, a grey square “No department” comes last. This is exactly the block that gets printed when you choose “Print office plan and notes”.
Ready-made scenarios
| Task | Settings |
|---|---|
| A plan for guests and newcomers | Hide color labels, switch place names on, print the plan only |
| A department map for HR | The “Departments” scheme, print the plan and the notes |
| An assignment map for the office manager | The “Usage type” scheme, switch assigned employee names on |
| A plan for a relocation meeting | Open the draft with the new seating and print it in the styling you need |
The last scenario is worth remembering separately: printing works in a draft too, so a future seating layout can be discussed on paper long before it is published.
Related articles
- Map editor: placing objects — the other modes of the editor;
- Seating drafts: overview — printing a layout option before publishing;
- Publishing a seating draft — how to move the printed option into the working map;
- Seating drafts: create, duplicate and delete — preparing the draft you want to print.
- Office map editor: an overview of the actions — all the actions with the map.