
Manage statuses in the schedule
Work statuses are the options an employee picks from when marking a day in the Work schedule section. Two base statuses always exist, while the refining ones — “Vacation”, “Sick leave”, “From home” — are created by the company administrator. This article is the settings reference: which fields a status has, what happens when it is deleted and why the base status becomes unavailable once the first sub-status is created.
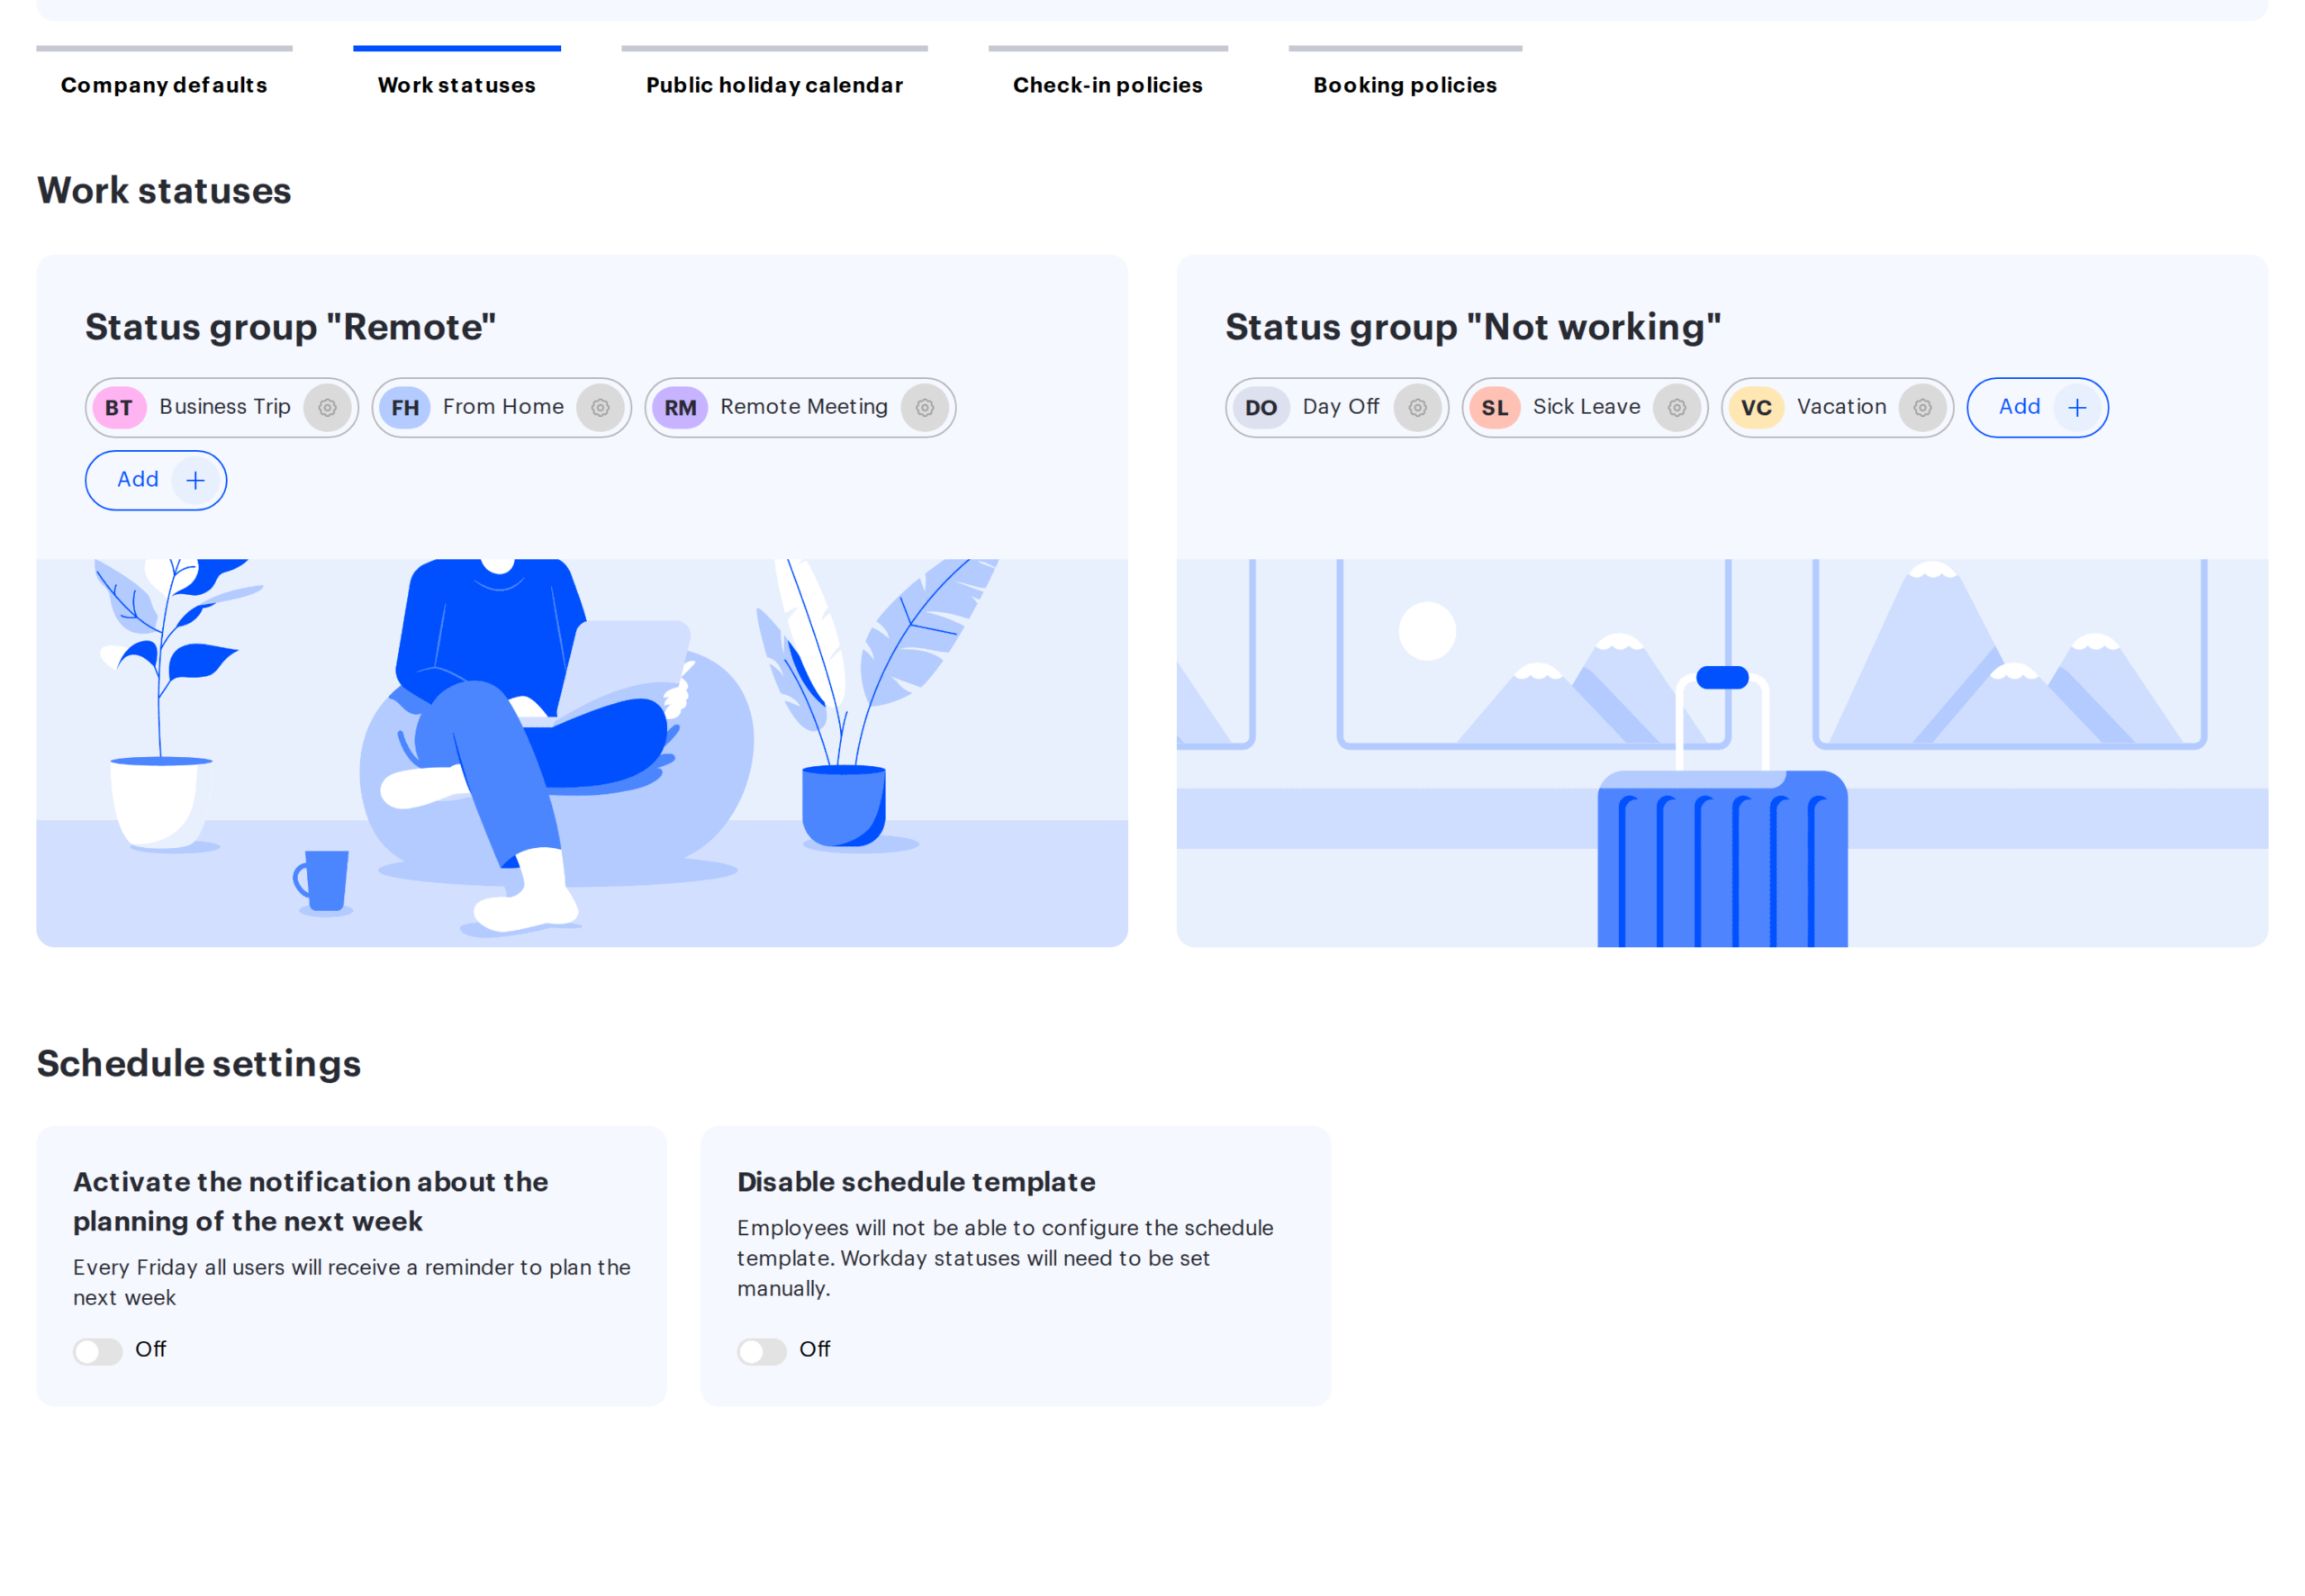
Where statuses are configured
The page lives in the company settings: Manage → Company settings → the Work statuses tab. The heading of the page itself repeats the tab label — “Work statuses”.
The tab appears only in companies where the schedule module is enabled. If the section is missing, it is the module, not your permissions.
Statuses are configured by the Super Administrator and the Offices Administrator. The list of configured statuses, however, is read by every employee — the day window on the schedule page needs it.
Two groups and what can be created in them
The page is split into two groups, and the split is rigid: there is no third group.
| Group on the screen | Base status | What can be created inside |
|---|---|---|
| Status group “Remote” | Remote | Sub-statuses such as “From home”, “Coworking”, “Business trip” |
| Status group “Not working” | Not working | Sub-statuses such as “Vacation”, “Sick leave”, “Day off” |
The “In office” status has no sub-statuses. “In office” is not a configurable status at all: it is the label of a day that has a desk booking. Neither the interface nor the API allows creating options inside it.
Out of the box the list is empty: a new company has no sub-statuses and employees use the two base ones.
Fields of a sub-status
| Field | Limit | Can it be changed later |
|---|---|---|
| Status type | Remote or Not working | No |
| Full title | up to 32 characters, unique within the group | No |
| Short title (max 6 characters) | up to 6 characters, unique within the group | Yes |
| Colour | One of the three colours of its group palette | Yes |
The short title is not decoration: it is what appears in the day cell on narrow screens and in the detailed attendance report. The full title is shown in the status selection window and in tooltips.
The palette is fixed — three colours per group, a separate set for “Remote” and for “Not working”. An arbitrary colour cannot be set, which keeps the statuses of one group recognisable in the schedule.
The full title cannot be edited after creation. If the title has to change, the status must be created anew under a new title and the old one deleted — with all the consequences of deletion described below.
The main consequence: the base status becomes unavailable
This is the most important property of the setting, and it is worth understanding before creating the first status.
As soon as a group contains at least one sub-status, the base status itself can no longer be selected. While the “Remote” group is empty, an employee marks a day simply as “Remote”. After a status “From home” is created in that group, the “Remote” button stops working on its own: the system requires a specific option.
The rule applies identically in three places: setting a status on a day, the schedule template and changing the status for a whole team. The creation form gives no warning about it.
A practical conclusion: if employees should keep the ability to mark “just remote”, create an explicit sub-status with that meaning — for example, “Remote” or “Out of office”.
Editing and deletion
Deleting a status does not check whether it is in use. There are no checks against the days already marked or against employee templates, and statuses have no trash bin.
What happens after deletion:
| Where the status was used | What it becomes |
|---|---|
| Schedule days in the past | They stay as they are: a day holds a copy of the title, colour and short title |
| Schedule days in the future | They stay as they are, for the same reason |
| An employee schedule template | The template day becomes “Status unavailable” — the employee has to choose a status again |
| The status selection window | The option disappears from the list |
Before deleting a status that is used in templates it is therefore worth warning employees — the deletion confirmation text asks for exactly that. The product itself sends no notification.
Statuses coming from integrations
Schedule statuses can be set not only by hand: they are delivered by integrations and by an External API method. There is a nuance here worth knowing while configuring.
- An integration passes the title and the short title as text, not as a reference to an option from the list.
- A status from an integration may therefore carry the same name as yours but look different: its colour is assigned automatically by group rather than taken from your setting.
- The title length limit for an integration is looser than in the interface — a status arriving from outside may be longer than anything you can create by hand.
- Such a status cannot be edited from this page: it is not in the list.
If the names of statuses matter for reporting, agree on a single list on the source side — see “External API: update user schedule status”.
Two company policies on the same page
Below the list of statuses, in the Schedule settings block, there are two toggles that have nothing to do with the statuses themselves but govern the whole Work schedule section.
| Toggle | What it does |
|---|---|
| “Activate the notification about the planning of the next week” | The caption explains it: “Every Friday all users will receive a reminder to plan the next week”. The reminder goes to employees who have no schedule template or have it switched off. While the toggle is on, it is delivered by email and push regardless of personal settings |
| “Disable schedule template” | Forbids employees to use the template: schedule days then have to be filled in manually |
⚠️ Switching the second toggle on deletes the templates already configured by every employee of the company. Switching it back off does not restore them — employees have to fill their templates in again. Enable this policy deliberately, not to see what it does.
Links with other settings
| Setting | How it relates to statuses |
|---|---|
| Public holiday calendar | Defines weekends and holidays. A status can be set on such a day, but the day is not counted towards the attendance target |
| Desk assignment | A day with a status is excluded from automatic booking of an assigned desk |
| Office attendance mode | “Not working” days are excluded from the denominator of the attendance target |
| Booking control (check-in) | A status removes a booking directly; check-in removes it for a missing confirmation — these are different mechanisms |
| Access rights to spaces | Unrelated: a status neither grants nor removes access to desks |
Limits and common misconceptions
| Misconception | How it actually works |
|---|---|
| A sub-status can be created for “In office” | It cannot: there are only two groups |
| The title of a status can be renamed | It cannot. Only the short title and the colour can be changed |
| Deleting a status wipes it from past days | It does not: a day holds a copy of the title and the colour |
| The number of statuses is limited | There is no limit on the number |
| After the first sub-status the base status stays available | It does not — see the section above |
| Any colour can be picked for a status | Only one of the three colours of its group palette |