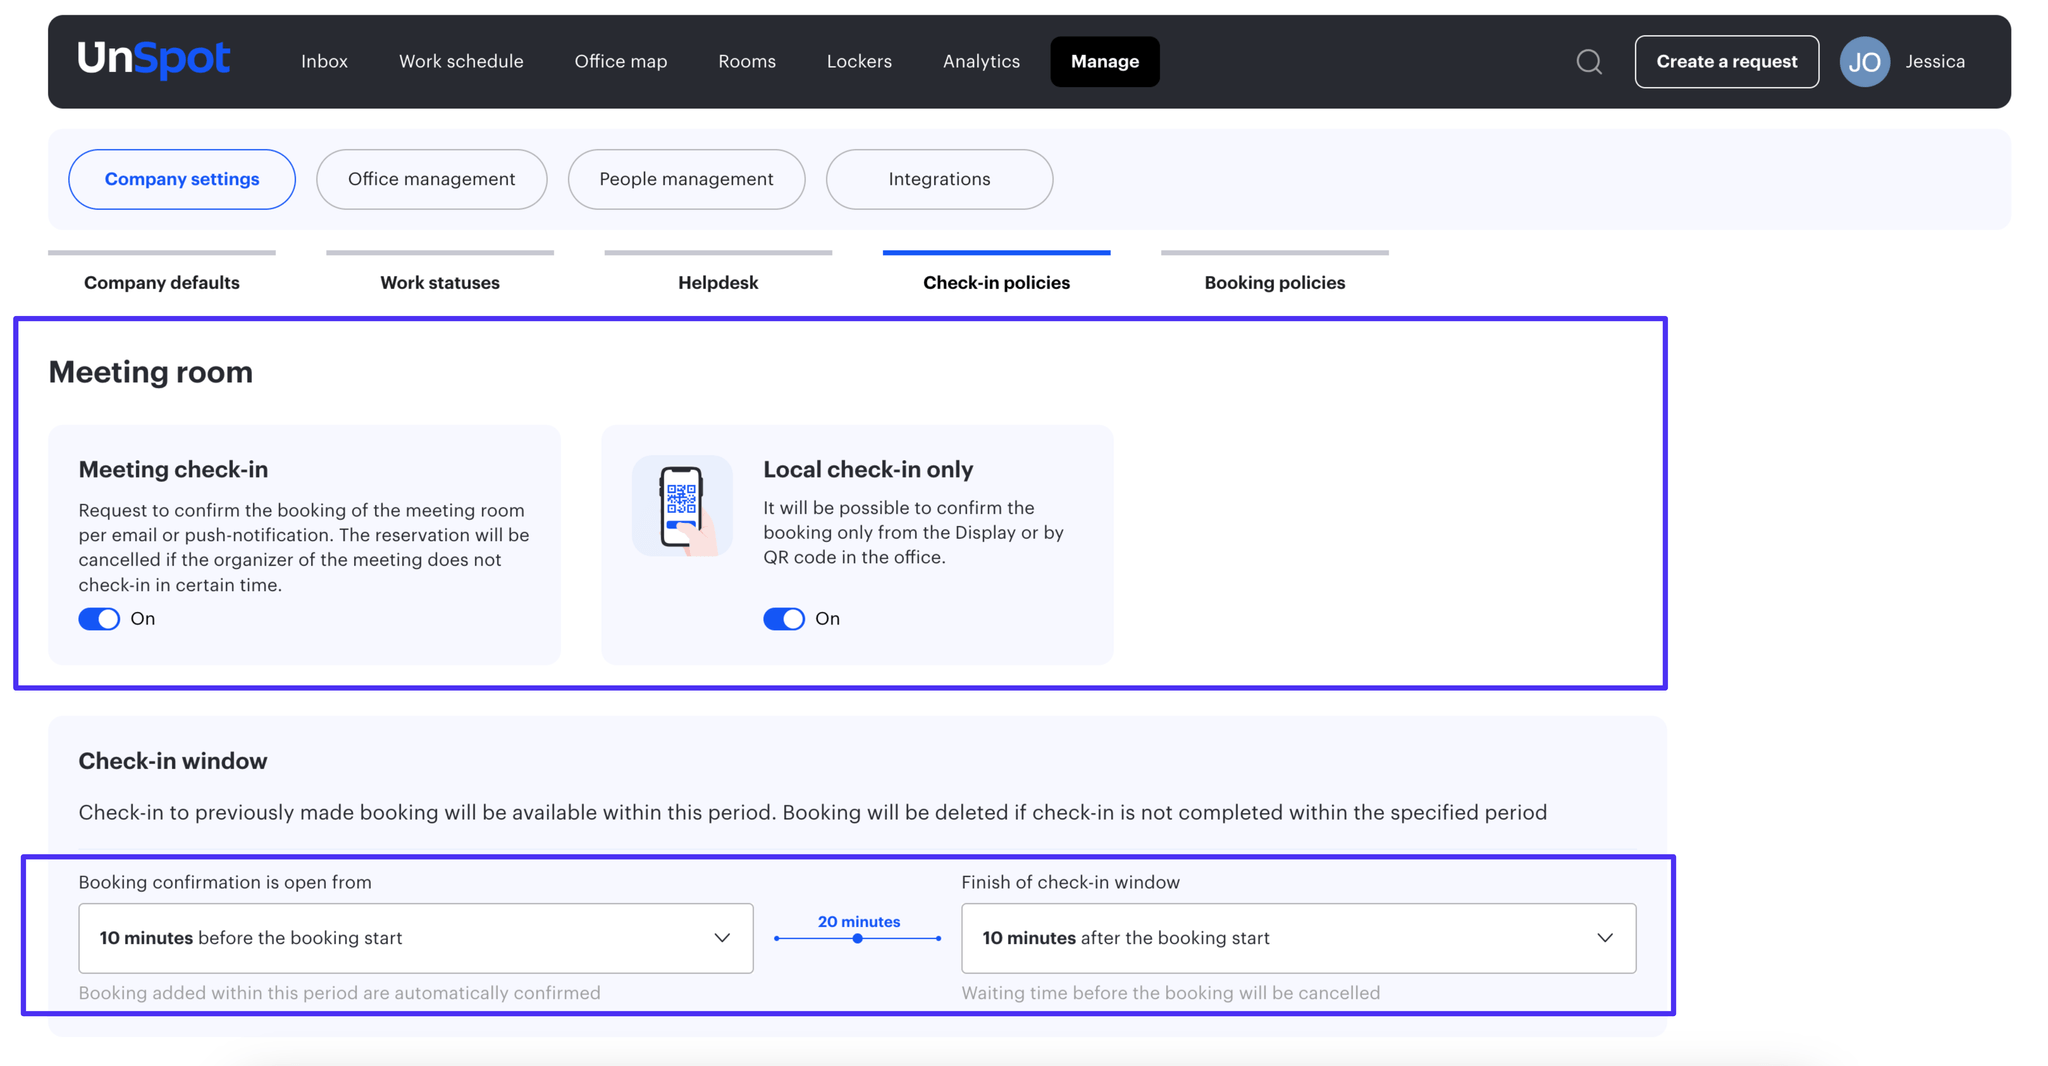
Check-in policies
Enabling booking confirmation can reduce the number of tables, meeting rooms and parking lots that are booked but not actually busy. After booking a space, the user will need to confirm the booking or it will be canceled automatically.
To configure reservation confirmation:
Go to “Administration → Manage →Check-in policies”. In this section, you can individually configure reservation confirmation for desks, meeting rooms, and parking places.
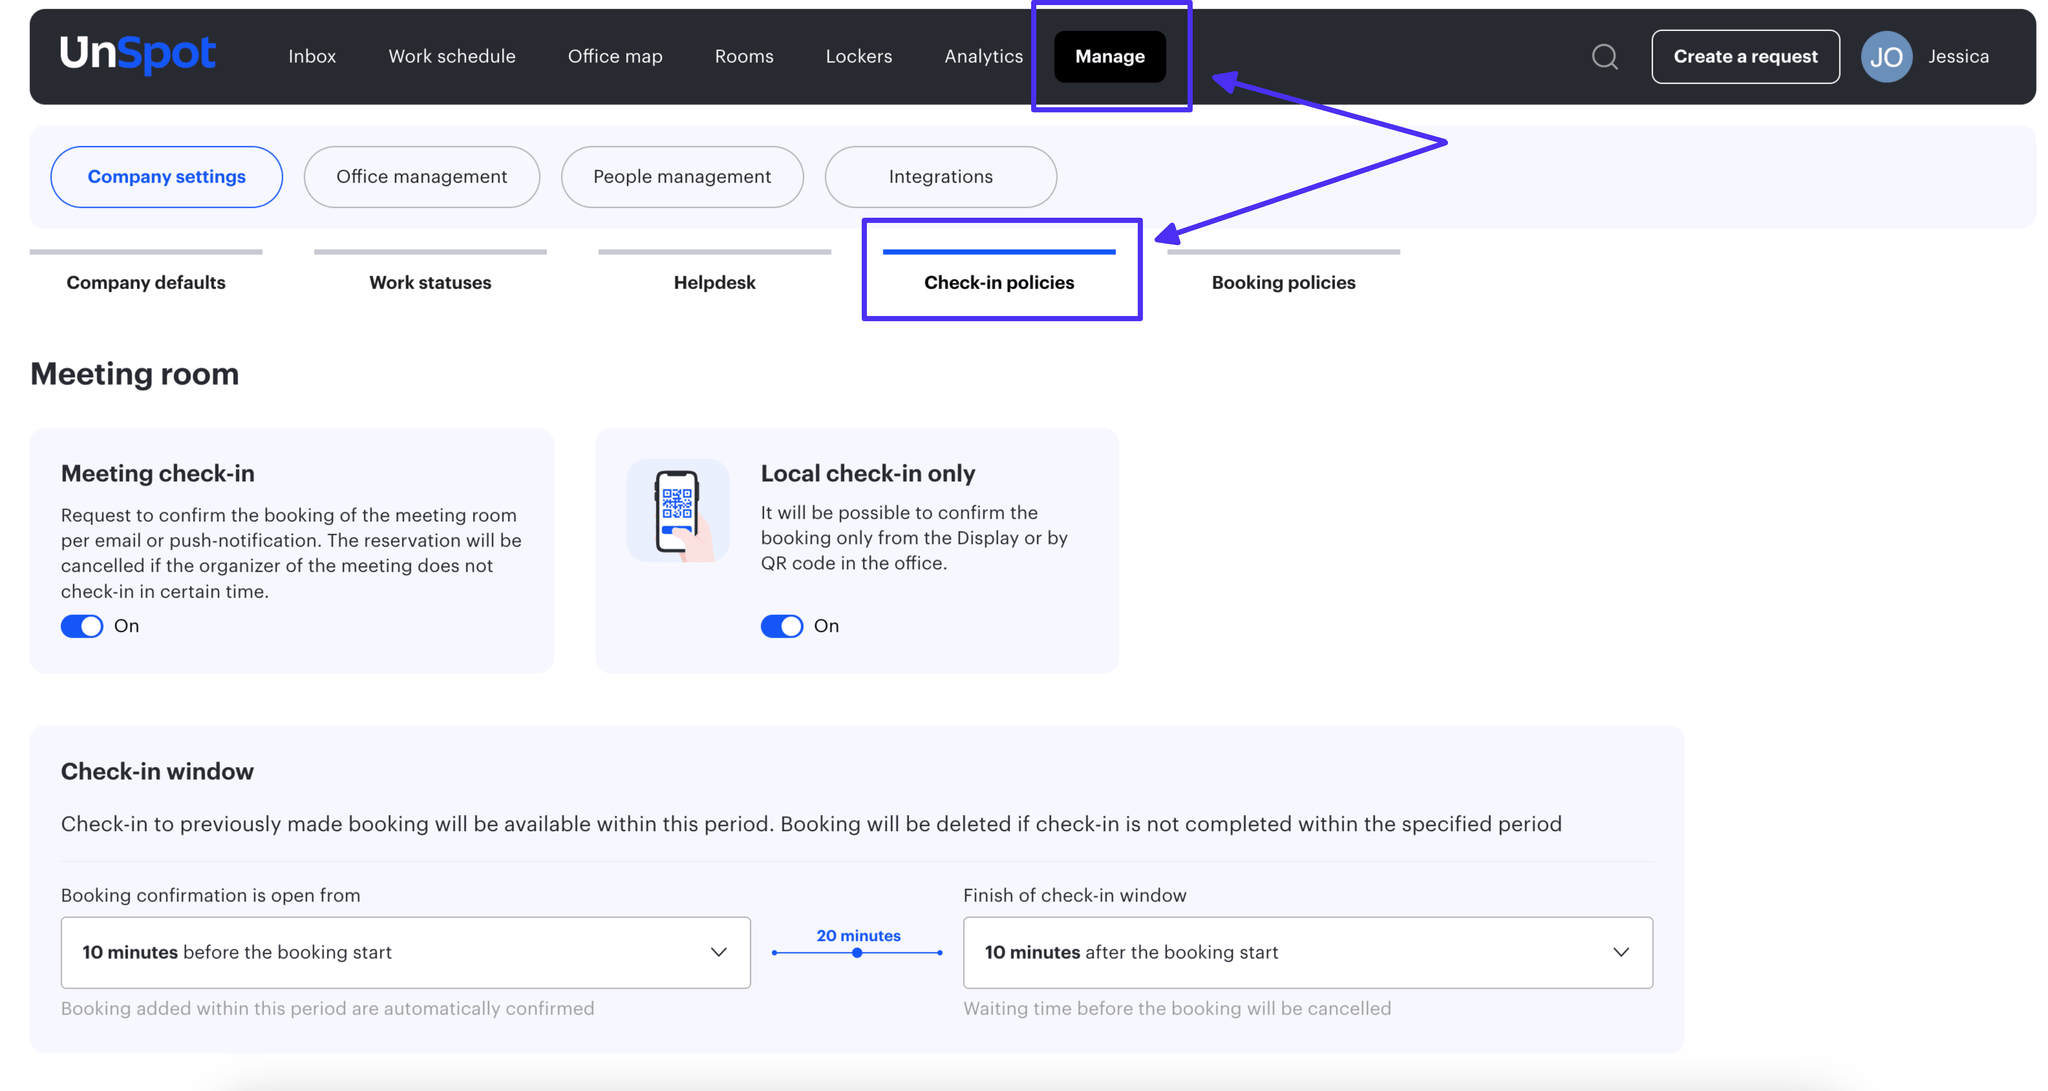
Check-in policies settings.
You can configure several types of check-in for desks and parking places:
Bookable – this setting is for online users to confirm desks and parking places reservations of the type bookable only on the current day and bookable on any days.
Assigned – this setting is intended for online users to confirm reservations of desks and parking places of the type assigned to one and assigned to several.
QR code – this setting is necessary for users to confirm reservations only in case of actual presence at the place by scanning the QR code on the table. After the QR code is scanned, the UnSpot website will open and the booking will be automatically confirmed
Note:
- Users must confirm the booking or the booking will be deleted. This is to ensure that desks, meeting rooms, parking places are not idle.
- By default for the “Bookable” and “Assigned” settings, confirming bookings can be done by email, Telegram, Slack, and push notifications.
- If you actively configure check-in policies by QR code for desks, all other confirmation methods will be disabled.

To enable and configure check-in desks and parking places:
1. Select a booking type and enable it.
Note: To activate the additional settings “Assigned” and “QR Code”, the main setting “Bookable” must be active.
2. Select the check-in window – the time before and after the booking during which the user will be given the opportunity to go through confirmation. If the user does not complete the check-in during this time, the reservation will be canceled.
3. Click the Save button.
Meeting check-in settings
The logic for setting meeting check-in is similar to the logic for setting check-in for desks and parking places described earlier.
Note: The default setting is “Meeting check-in”. By default, meeting check-in can be done by email, Telegram, Slack, and push notifications.
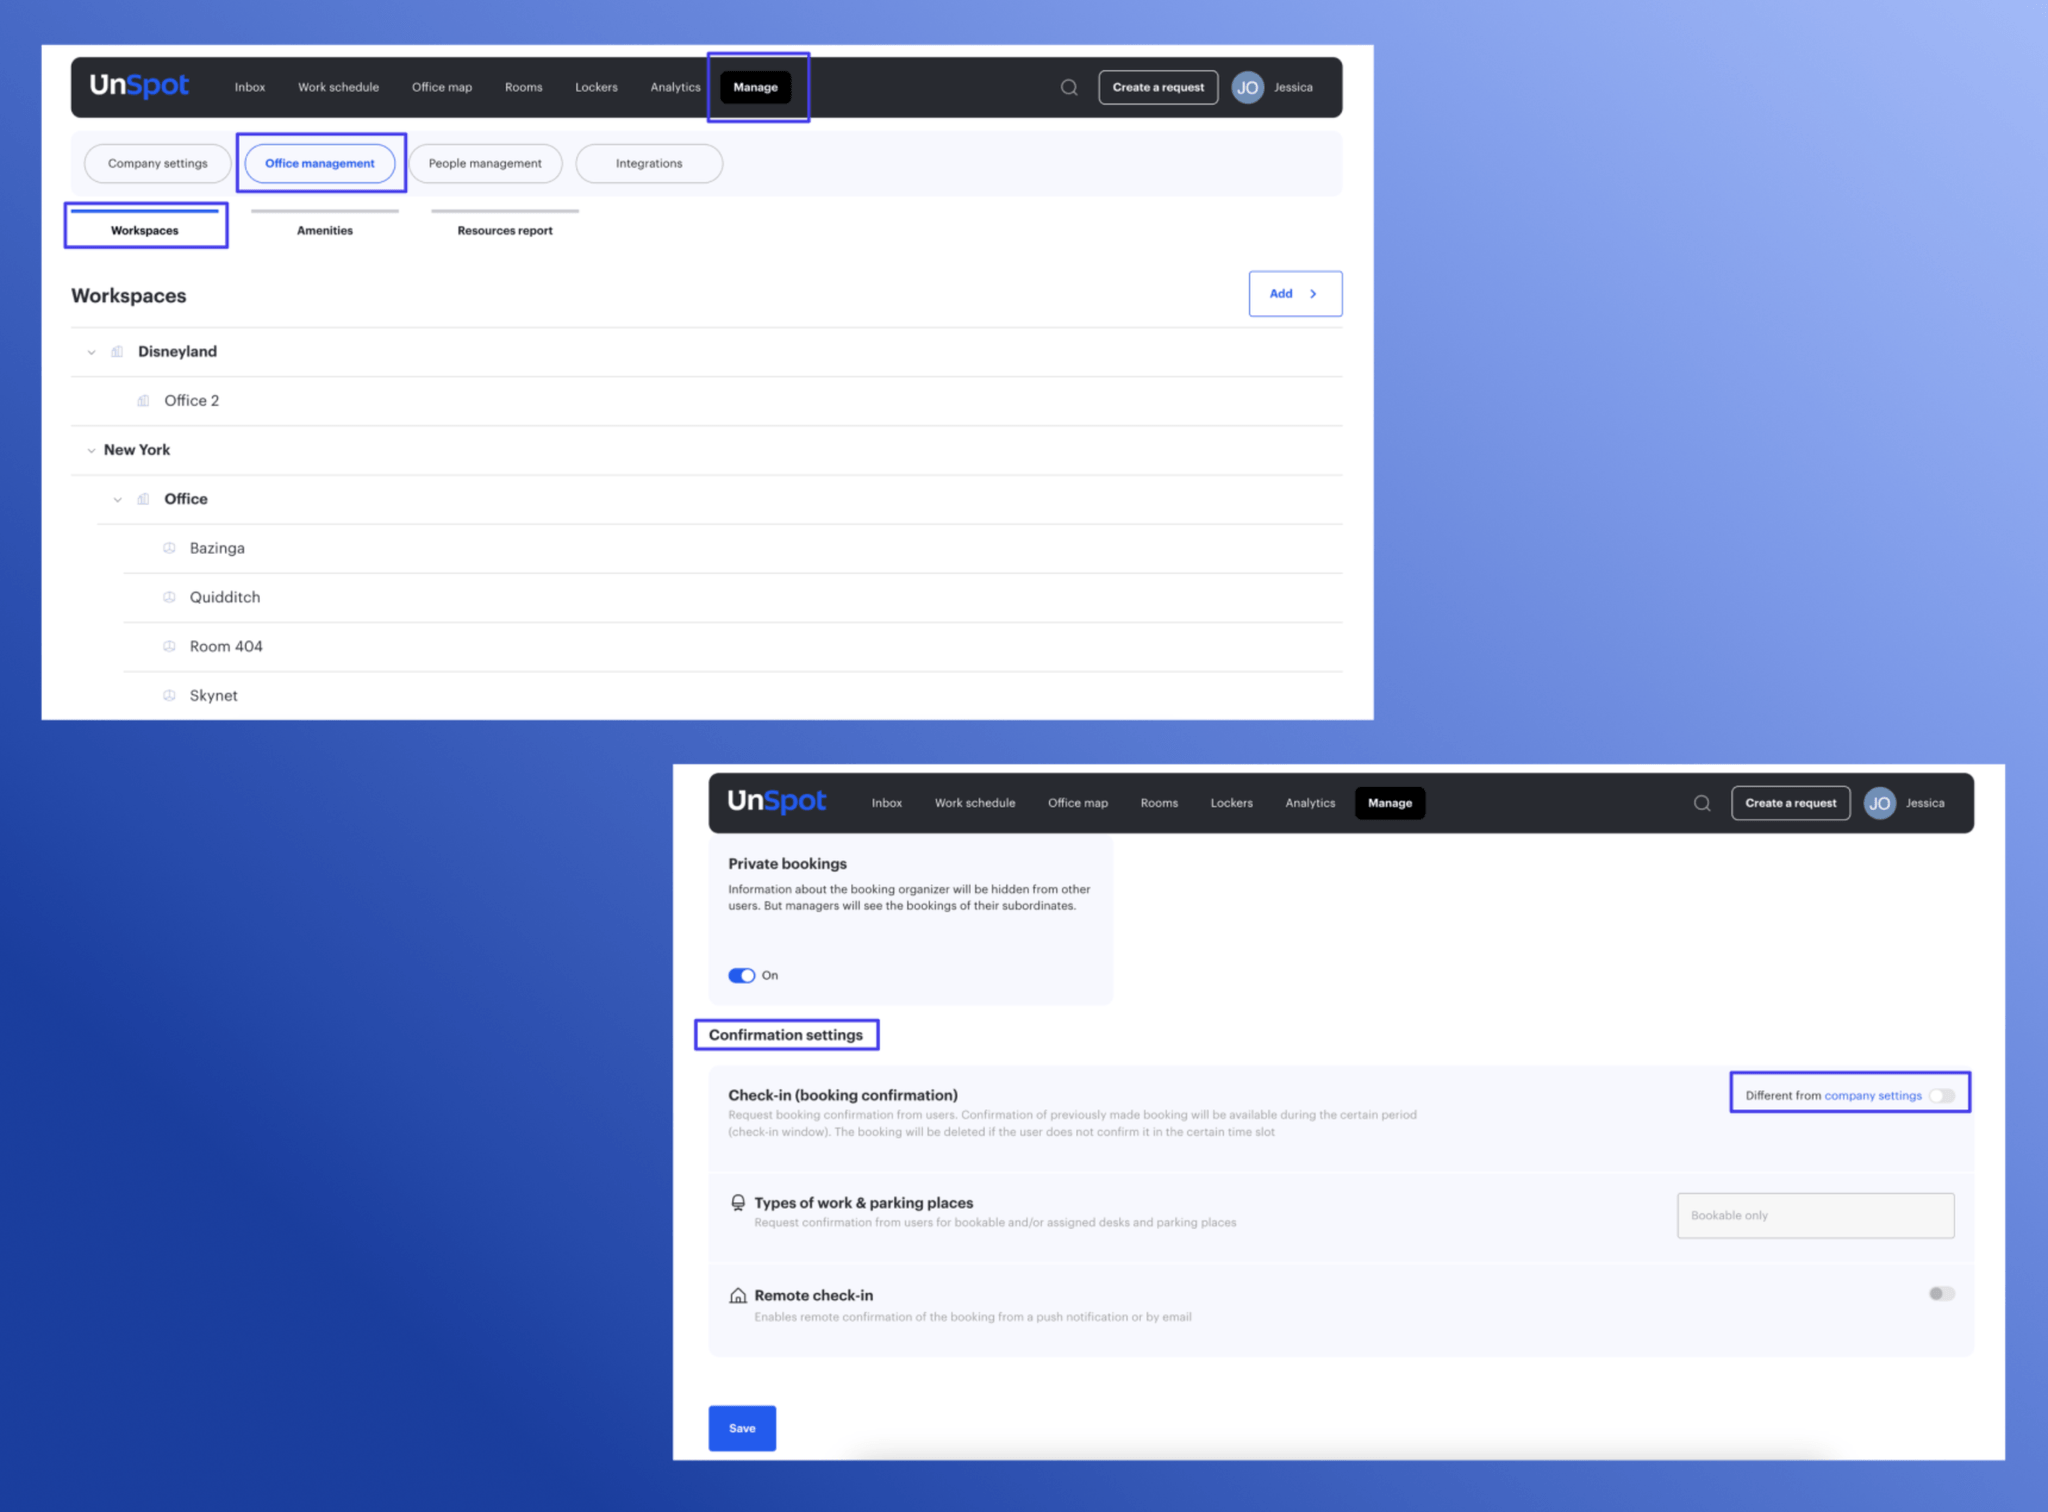
Changing confirmation settings for an individual space
You can change the check-in policies individually for every space.
Important: Custom settings for spaces will not appear if no check-in desks and parking places or meeting check-in is selected.
To change the settings:
- Go to “Manage” → “Office Management” → “Workspaces” and click “Edit” against the required office.
- Configure individual booking settings. These settings will be applied only for the selected office.
- Click “Save”